Since its introduction in iOS 13, UIMenu has become the de facto way of presenting users with a list of contextual actions across Apple’s platforms. In fact, prior to iOS 13, this was still a common design pattern for showing extraneous options to the user, without cluttering the UI. However, developers had to implement their own menu system, often comprising of table views, table view cell subclasses, view controller subclasses and, if you’re feeling fancy, custom view controller presentation and dismissal transitions - no mean feat, I’m sure you’ll agree.
During WWDC 2019, the Apple developer community collectively breathed a sigh of relief, knowing that, in a few years’ time, they’ll be able to scrap their hundreds, if not thousands, of lines of custom context menu code in favour of an expressive, flexible UIMenu declaration.
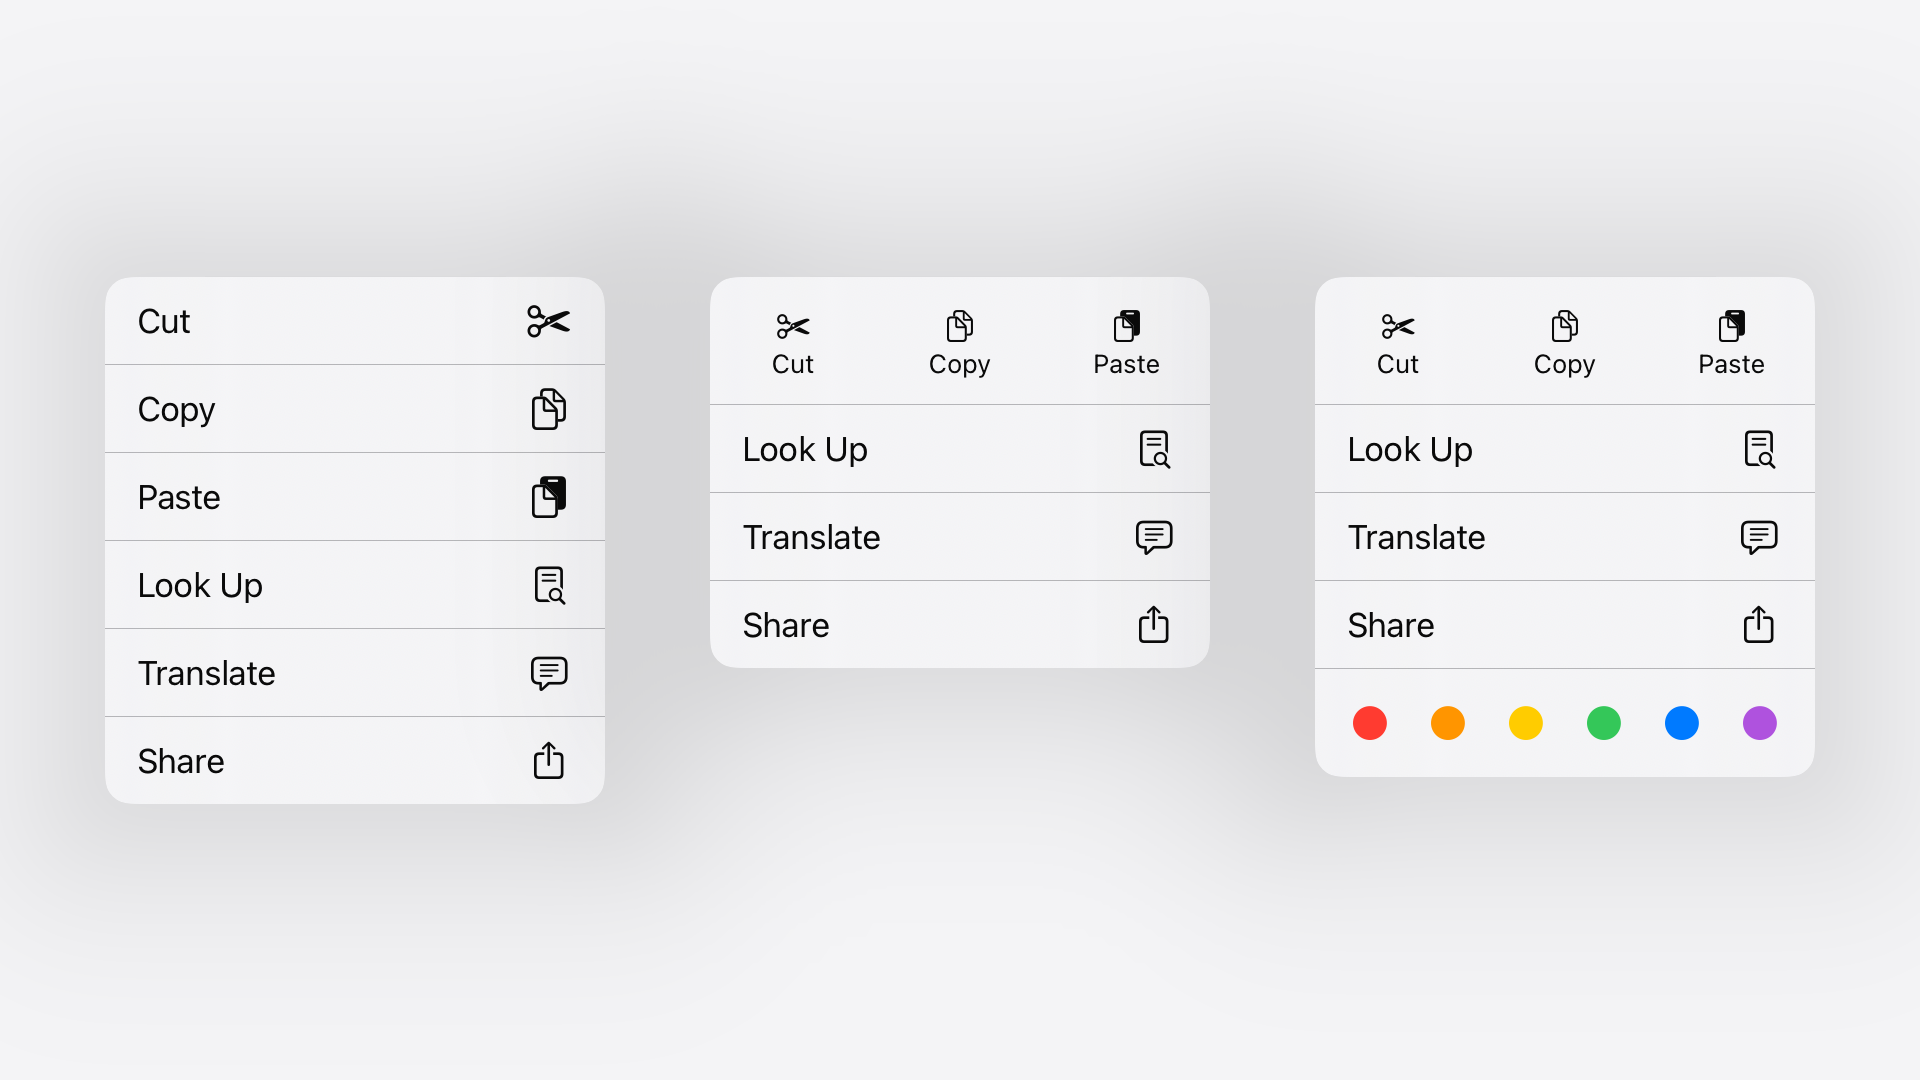
And Apple hasn’t stood still, UIMenu has received a lot of love over the years since its debut. Initially, in iOS 13, UIMenus could only be presented as a result of a context menu interaction, long pressing on a table view cell, for example. But, in iOS 14, Apple added support for displaying a UIMenu as a button’s primary action with UIButton's new showsMenuAsPrimaryAction property. Alongside that, support was added for UIBarButtonItems, allowing you to present menus from navigation bar and tool bar buttons. In iOS 16, UIMenu’s preferredElementSize made an appearance, allowing for a compact, horizontal arrangement of menu items. And, most recently, in iOS 17, Apple added support for palette-style menus with the displayAsPalette option.
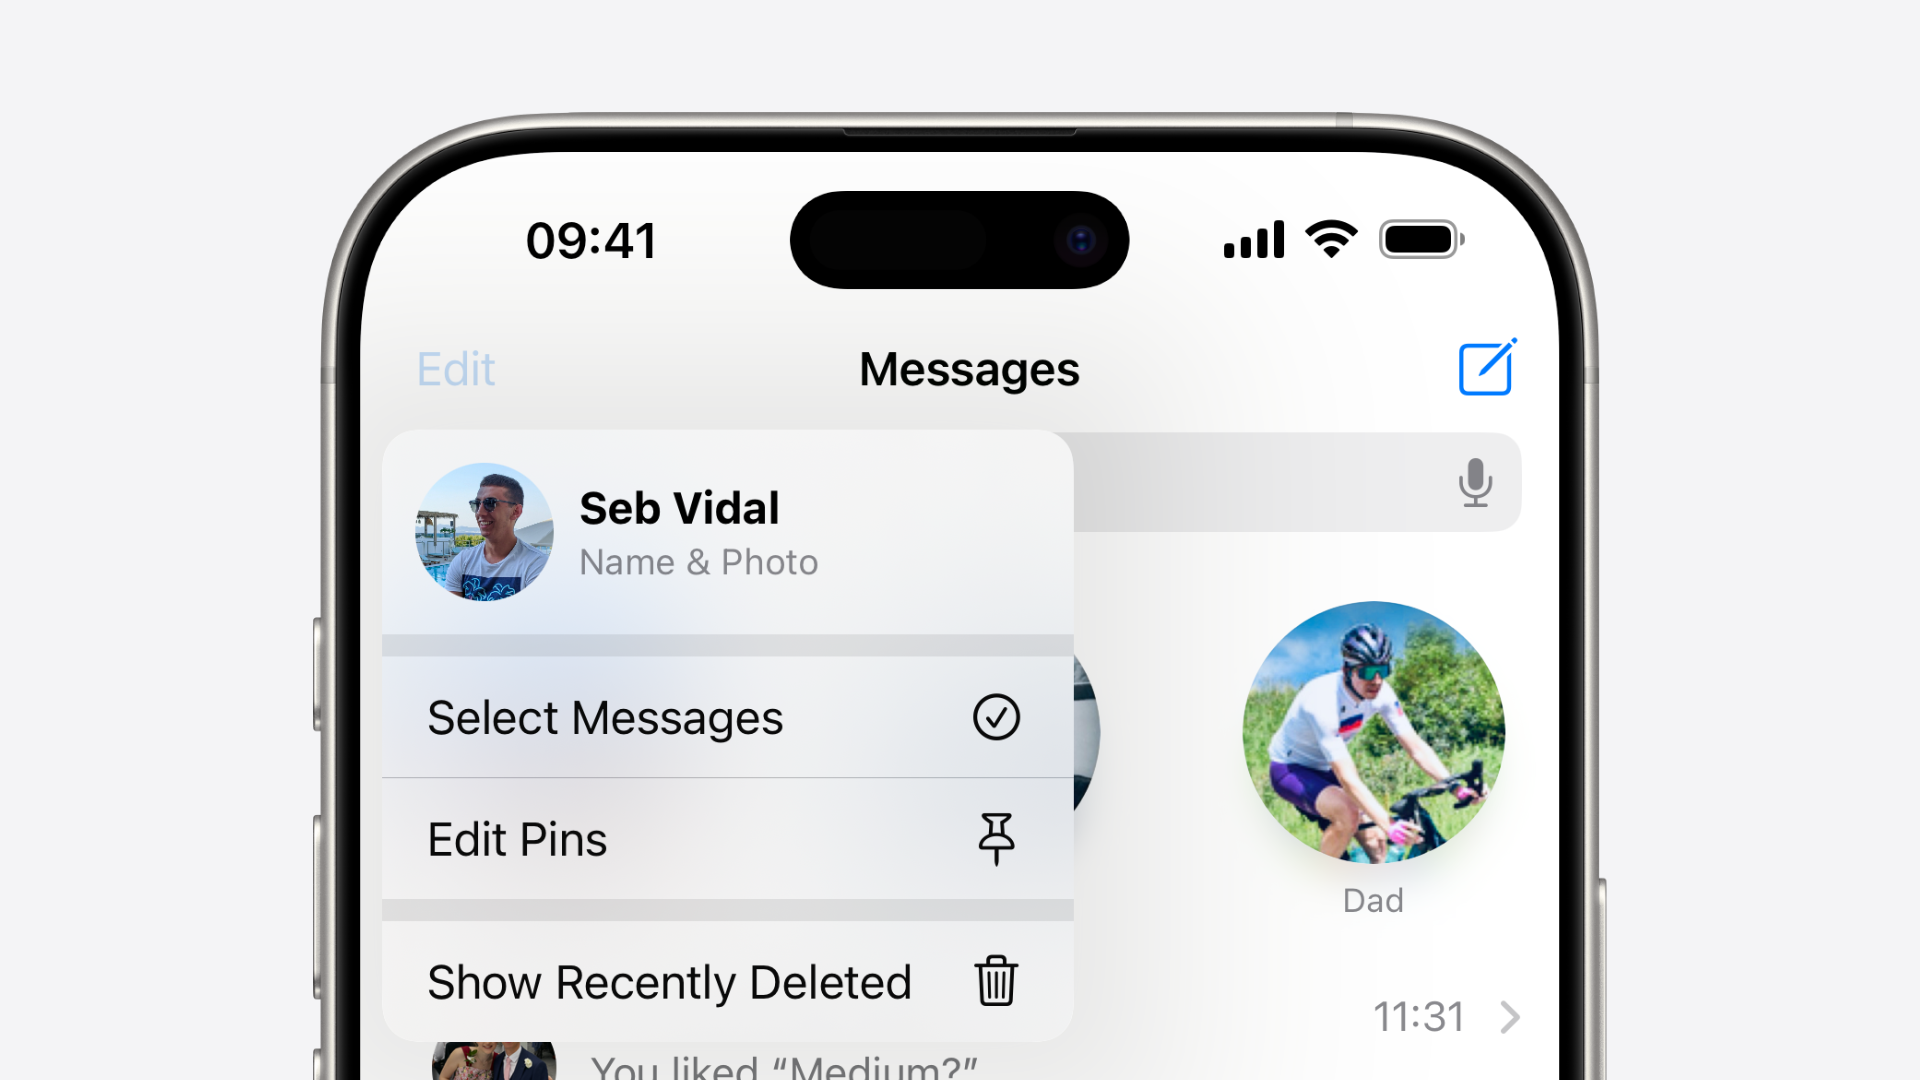
There is one, not-so-small, omission from UIMenu’s API surface, however. And that is menu elements comprising of a custom view. Currently, elements in a UIMenu are defined using the UIAction API. This API allows customisation of the action’s, and therefore menu element’s, title, subtitle, image and attributes such as whether or not the action is enabled, or considered destructive in nature. But! If you open Messages, and tap on the “Edit” bar button item in the navigation bar, there you have it, a menu element with a totally custom view. Oh, Apple…
So, the easy part is done - finding where Apple use private UIKit API in their user interfaces is like finding…well, hay in a haystack…but now we have to find the needle. Fortunately, I’ve done the needle finding for you and, in this article, we’ll be exploring two private UIMenu APIs - UICustomViewMenuElement and UIMenu’s headerViewProvider.
Let’s get started!
UICustomViewMenuElement
The first of the two private UIMenu APIs we’ll explore in this article is called UICustomViewMenuElement - and it does exactly what it says on the tin. It allows you to create a menu element with a totally custom UIView, instead of the normal title and image combo derived from a UIAction. The most notable use of this API is in Apple’s Messages app and, new in iOS 18.2, Mail.
We can get more information about this private class using class-dumped runtime headers, such as those found on Elias Limneos’ website. If we check out the header file for UICustomViewMenuElement, there are a few methods of interest, not least a static elementWithViewProvider: method.

@interface UICustomViewMenuElement :UIMenuElement <_UIMenuLeaf> {
// ...
+ (id )elementWithViewProvider :(id /* block */ )arg1;
// ...
}
The header file very helpfully tells us that the first and only parameter of this method is an Objective-C block, the equivalent of a Swift closure. But, less helpfully, the header doesn’t tell us anything about the parameter types or return value of said block.
One way to determine the type of the block is to use an app like Hopper to disassemble Apple's private UIKitCore framework, find the method in question, in this case +[UICustomViewMenuElement elementWithViewProvider:], and dump the assembly code into some LLM, asking it to convert the assembly into Objective-C. This is an imperfect science, but works pretty well on the whole. Here's what Claude spat out...

+ (instancetype )elementWithViewProvider :(UIView *(^)(void ))viewProvider {
viewProvider = [viewProvider copy];
UICustomViewMenuElement *instance = [self alloc];
instance = [instance initWithTitle:@"" image:nil imageName:nil ];
if (instance) {
[instance setViewProvider:viewProvider];
}
return instance;
}
We can ignore the implementation of the method as the bit we're interested in is the type of the block - UIView *(^)(void). In the world of Swift, that translates to () -> UIView. So, let's create a handy extension of UIMenu to create an instance of UICustomViewMenuElement...

extension UIMenu {
static func customViewElement (_ viewProvider:@escaping ViewProvider ) ->UIMenuElement ? {
let elementClass =NSClassFromString ("UICustomViewMenuElement" )as ?NSObject .Type
let viewProviderSelector =NSSelectorFromString ("elementWithViewProvider:" )
guard let elementClass, elementClass.responds(to: viewProviderSelector)else {return nil }
let result = elementClass.perform(viewProviderSelector, with: viewProvider)
let element = result?.takeUnretainedValue ()as ?UIMenuElement
return element
}
typealias ViewProvider =@convention (block) () ->UIView
}
For the uninitiated this code...
- Resolves a reference to an Objective-C class whose name matches the provided string, in this case, "UICustomViewMenuElement", and casts it to the type of
NSObject. - Creates a selector, which is a unique identifier representing an Objective-C method, from the string "elementWithViewProvider:".
- Checks that the class exists and that said class has the
elementWithViewProvider:method. This is an important step asUICustomViewMenuElementis a private, undocumented UIKit class meaning that its interface could change at any time or be removed entirely without warning. - Calls the
elementWithViewProvider:method onUICustomViewMenuElement. Note that we haven't created an instance ofUICustomViewMenuElementto call the function as this is a static method, not an instance method. - Takes and returns the result of the
elementWithViewProvider:method call and casts it to the type ofUIMenuElement.
For readability, I created a type alias of () -> UIView called ViewProvider. Here's how we'd use this new code...

class ViewController :UIViewController {
override func viewDidLoad () {
super .viewDidLoad ()
let customViewElement =UIMenu .customViewElement {
return AvatarMenuElementView ()
}!
let barButtonItem =UIBarButtonItem (systemItem : .edit)
barButtonItem.menu =UIMenu (children : [customViewElement])
navigationItem .leftBarButtonItem = barButtonItem
}
}
Important
To keep thing simple in the code sample above, I've force unwrapped the result of the call toUIMenu.customViewElement(_:). If you intend on using this code in a production app, you should handle the optional value properly to avoid a crash. And here's what that looks like. Note that in the closure I'm returning a custom UIView subclass called AvatarMenuElementView, this is just for brevity and can be any UIView or UIView subclass you like.
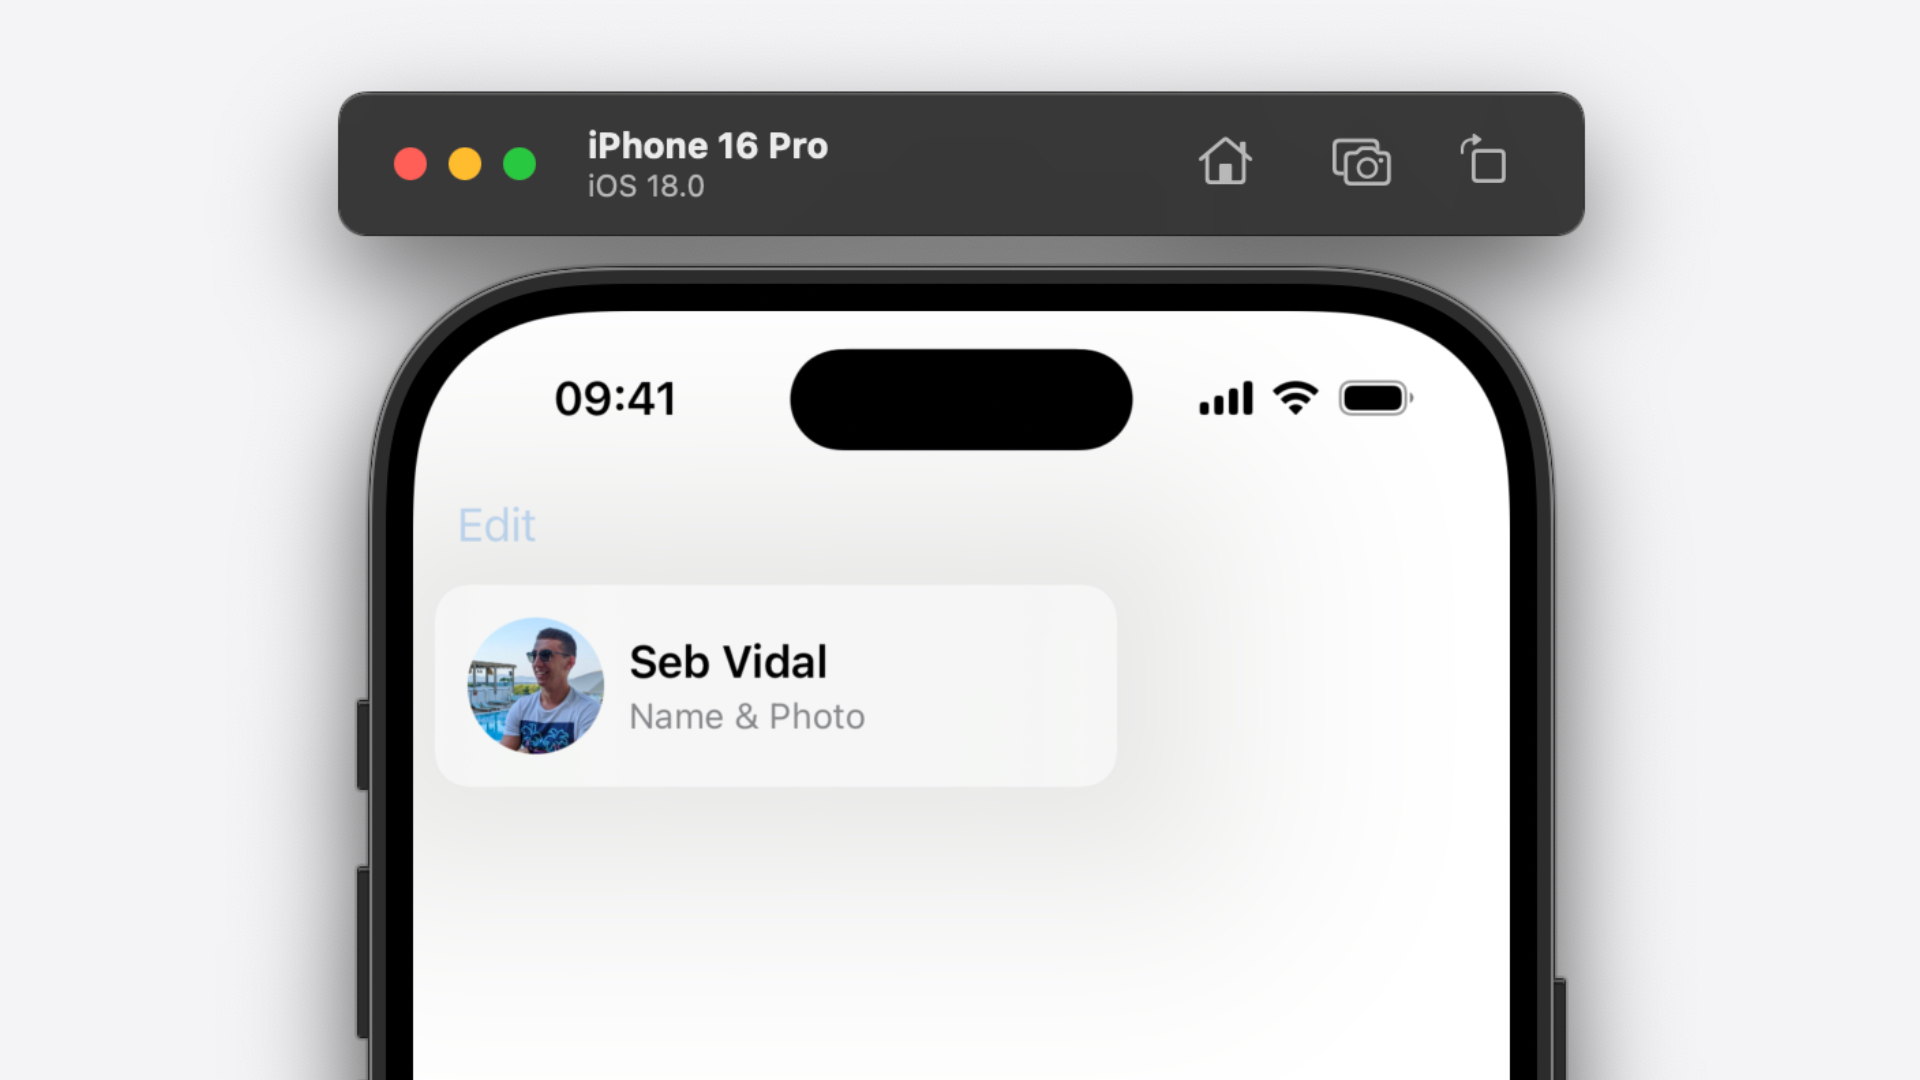
It's worth noting that, at this point, your custom menu element won't actually be selectable. This may or may not be what you want, but this appears to be by design. If the custom element was always selectable, it would interfere with any interactive elements in the view hierarchy of your custom view. To enable selection of your custom element, we need to provide the menu with an action to perform when your custom element is selected. So how do we do that? Well, let's go back to UICustomViewMenuElement's private header file...

@interface UICustomViewMenuElement :UIMenuElement
// ...
- (void )setPrimaryActionHandler :(id /* block */ )arg1;
// ...
@end
The setPrimaryActionHandler: method certainly seems like a good place to start. Going back to UIKitCore's disassembly in Hopper, tracking down -[UICustomViewMenuElement setPrimaryActionHandler:] and dumping its implementation into Claude reveals a block of type void (^)(void) or () -> Void in Swift. So let's update the customViewElement(_:) method in our UIMenu extension...

extension UIMenu {
static func customViewElement (_ viewProvider:@escaping ViewProvider ,primaryActionHandler :Handler ? =nil ) ->UIMenuElement ? {
// ...
let setHandlerSelector =NSSelectorFromString ("setPrimaryActionHandler:" )
guard element ?.responds(to: setHandlerSelector) ==true else {return element }
element ?.perform(setHandlerSelector, with: primaryActionHandler)
return element
}
// ...
typealias Handler =@convention (block) () ->Void
}
Quick overview! This new code...
- Creates another selector from the string "setPrimaryActionHandler:".
- Checks that an instance of
UICustomViewMenuElementresponds to said selector. - Calls the selector's corresponding method, passing in the new
primaryActionHandleras an argument.
Again, for readability, I added a Handler type alias. The primaryActionHandler parameter of our function is also optional, with a default value of nil. This keeps the call site clean if our API consumer doesn't need to supply an action. Calling our new function now looks something like this...

class ViewController :UIViewController {
override func viewDidLoad () {
super .viewDidLoad ()
let customViewElement =UIMenu .customViewElement {
return AvatarMenuElementView ()
} primaryActionHandler: {"Hello, World!" )
}!
let barButtonItem =UIBarButtonItem (systemItem : .edit)
barButtonItem.menu =UIMenu (children : [customViewElement])
navigationItem .leftBarButtonItem = barButtonItem
}
}
And there you have it – a selectable, custom view menu element that performs an action and dismisses the menu on selection.
-[UIMenu headerViewProvider]
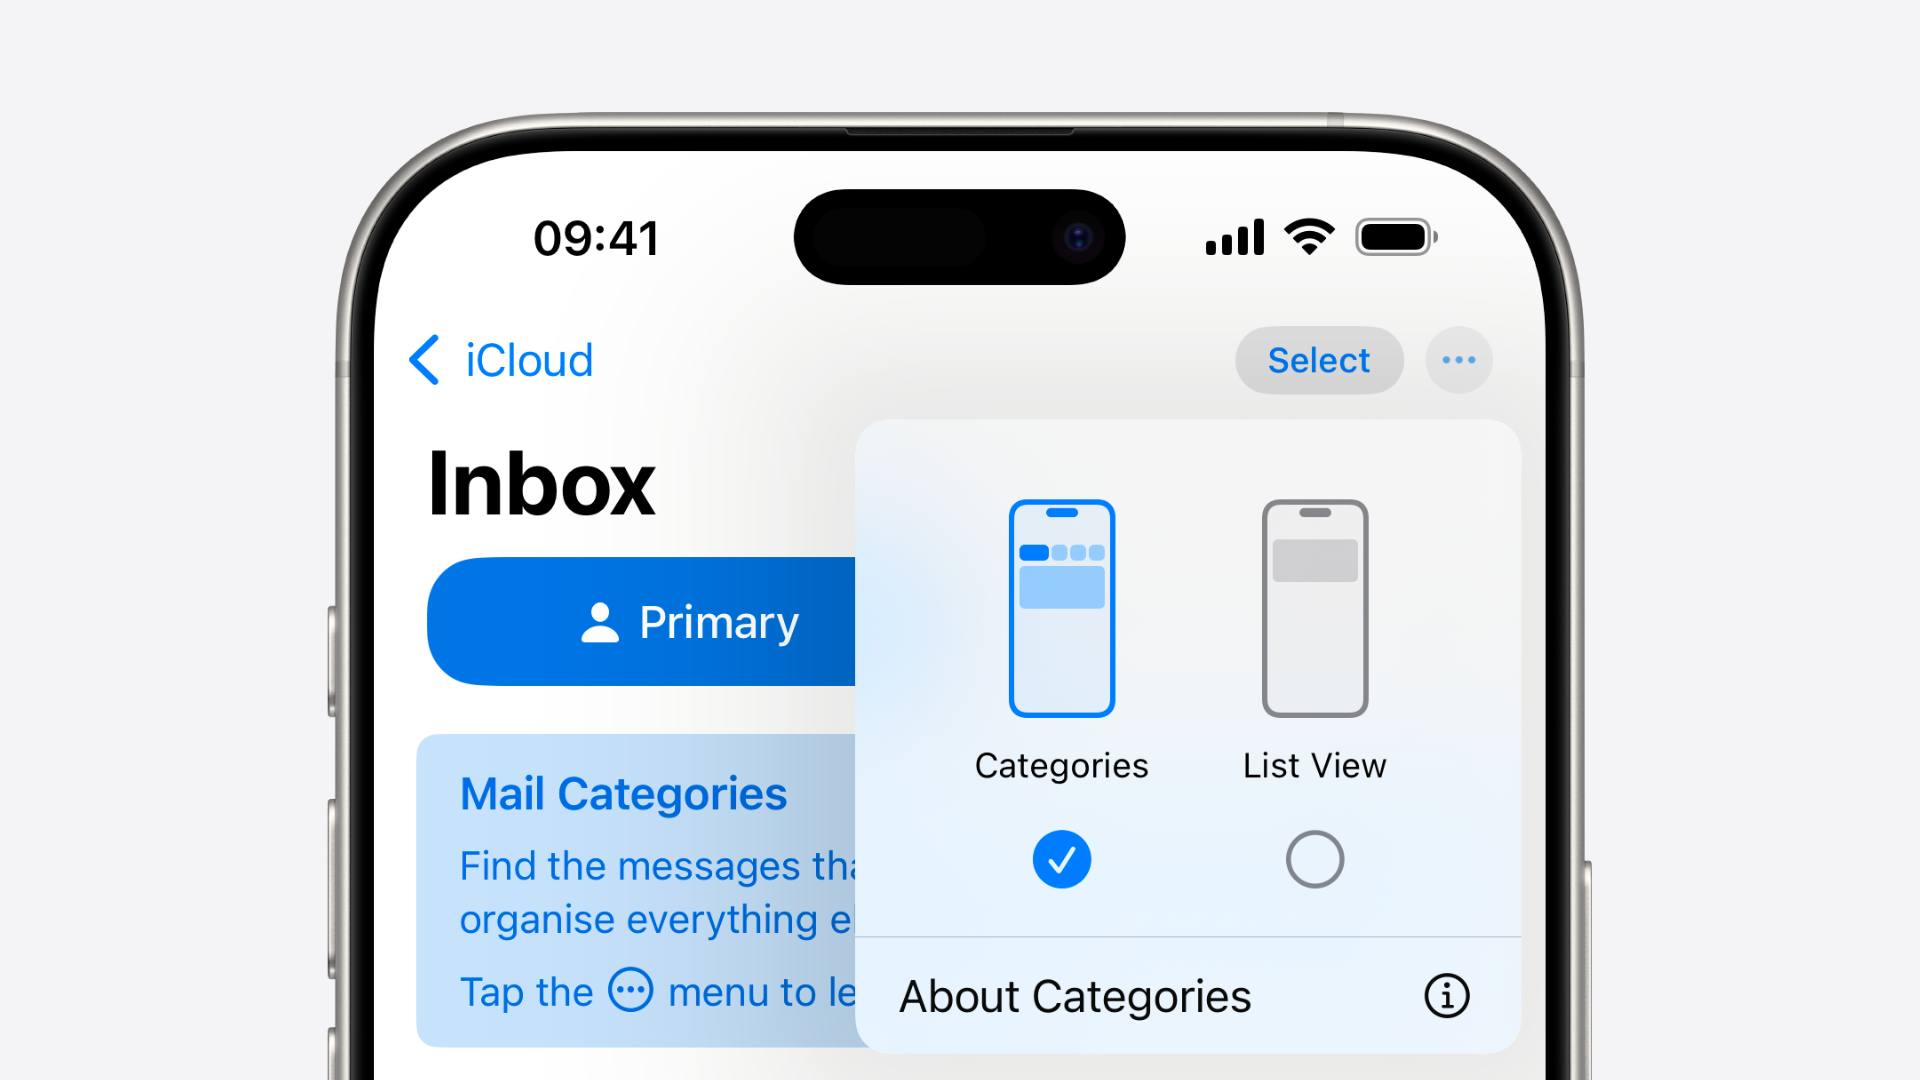
The second of the two private UIKit APIs we'll look at in this article is UIMenu's headerViewProvider property. This is the API responsible for the custom view seen at the top of menus in document-based apps such as Apple's Files app.
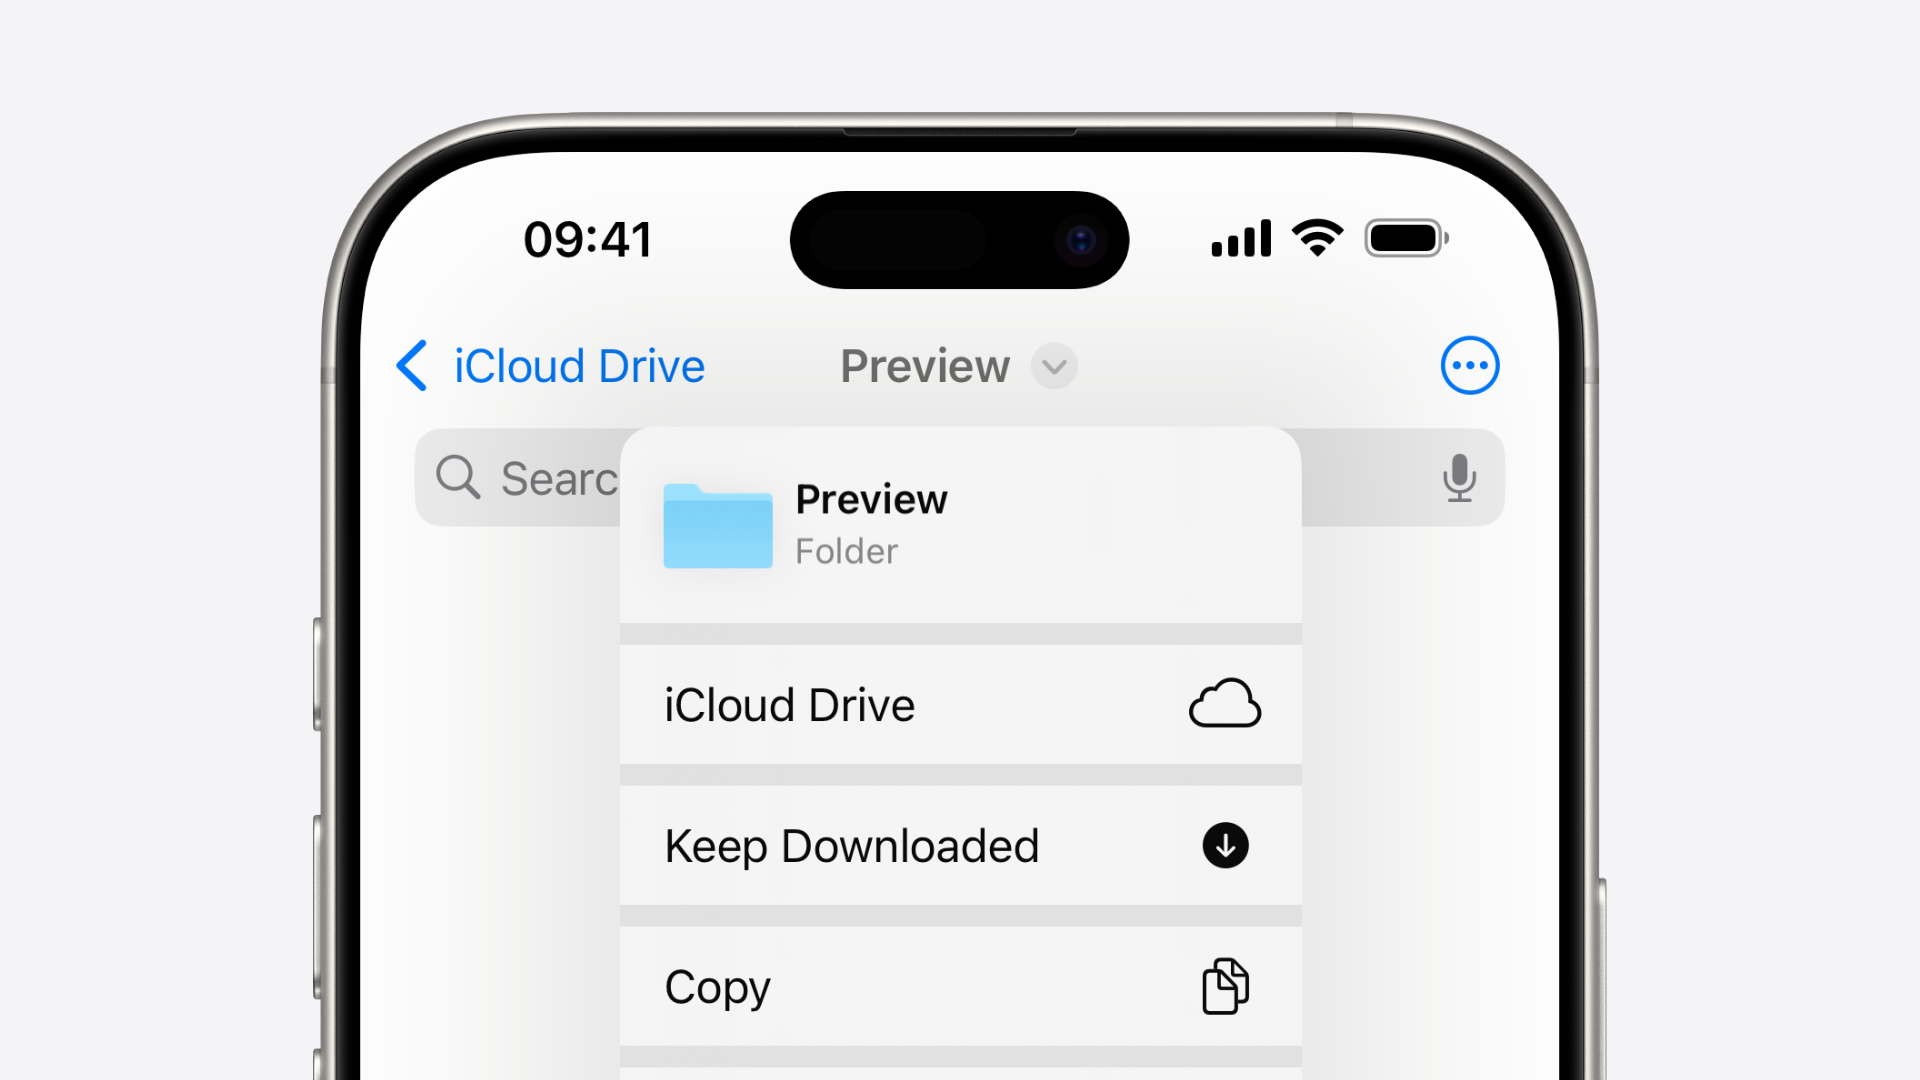
While, visually, a UIMenu with a headerViewProvider looks similar to a UICustomViewMenuElement, there are some subtle differences. The first being that an action cannot be assigned to a header view, meaning it can never be selectable, unlike regular menu elements. The second key difference is that a header view always sits at the top of a menu, with a separator between it and the menu's items.
So how do we go about assigning a header view to a UIMenu? Like always, the answer lies in the private header files - this time, UIMenu's.

@interface UIMenu :UIMenuElement <_UIMenuElementStateObserver>
// ...
- (void )setHeaderViewProvider :(id /* block */ )arg1;
// ...
@end
Using our Hopper-LLM trick, we can see the type of arg1 is UIView *(^)(void) or () -> UIView in Swift land. Here's one way we could implement an interface for getting and setting a menu's header view provider...

extension UIMenu {
var headerViewProvider :HeaderViewProvider ? {
get {
let string ="headerViewProvider"
let selector =NSSelectorFromString (string)
guard responds(to: selector)else {return nil }
return value (forKey : string)as ?HeaderViewProvider
}set {
let string ="setHeaderViewProvider:"
let selector =NSSelectorFromString (string)
guard responds(to: selector)else {return }
perform(selector, with: newValue)
}
}
typealias HeaderViewProvider =@convention (block) () ->UIView
}
For convenience, I've used another type alias here. Doing so allows us to easily cast the result of the value(forKey:) call to the expected return type. Below is how you'd use this property.

class ViewController :UIViewController {
override func viewDidLoad () {
super .viewDidLoad ()
let iCloudAction =UIAction (title :"iCloud Drive" ,image :UIImage (systemName :"icloud" )) { _in
// ...
}
let menu =UIMenu (children : [iCloudAction])
menu.headerViewProvider = {
return FileMenuHeaderView ()
}
let barButtonItem =UIBarButtonItem (image :UIImage (systemName :"ellipsis.circle" ))
barButtonItem.menu = menu
navigationItem .rightBarButtonItem = barButtonItem
}
}
And here's what that looks like. Again, for demonstration purposes, I'm returning a custom UIView subclass but this can be any old UIView.
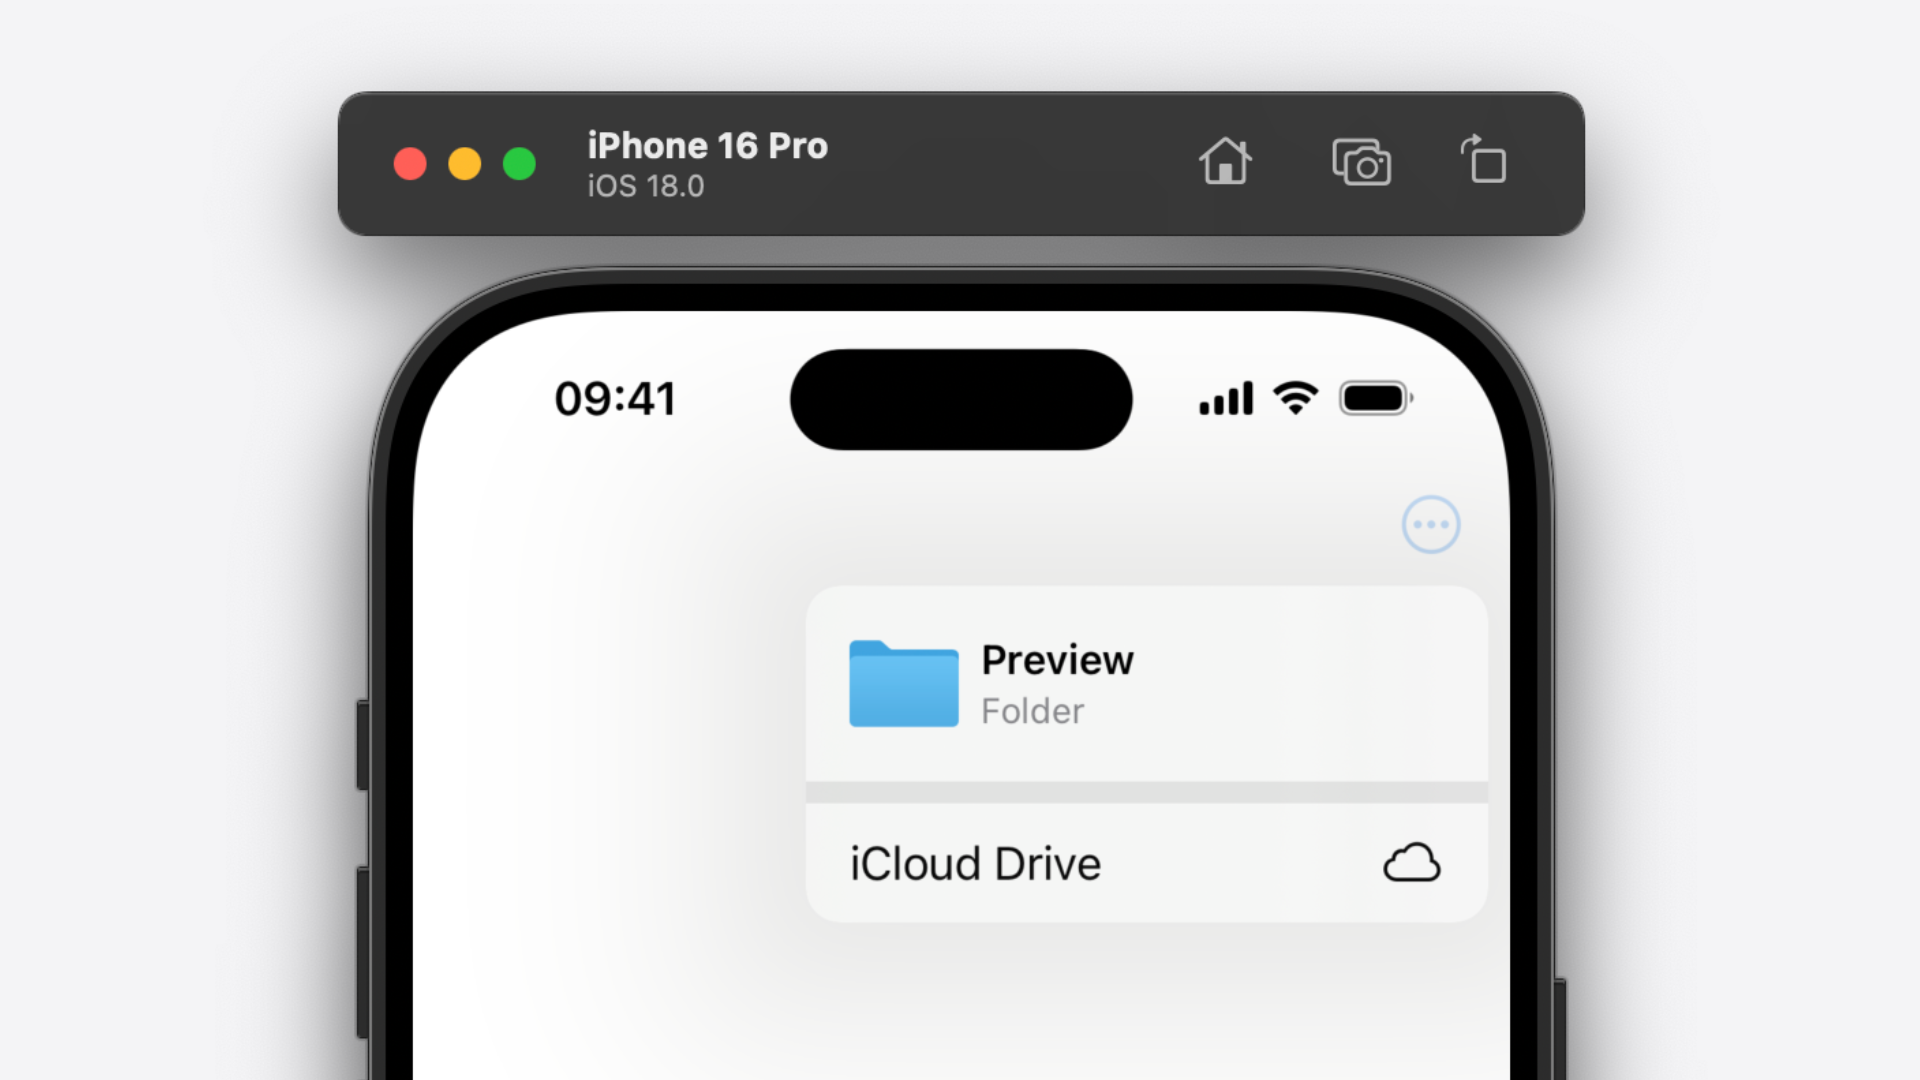
Tip
To dismiss the menu programmatically as a result of an action performed by a control in your header view, callUIViewController's presentedViewController?.dismiss(animated: true) method. Conclusion
So there you have it – custom UIMenu elements and headers! It goes without saying that these are private, undocumented APIs, the use of which are prohibited in an app you're submitting to the App Store. Doing so risks your app being rejected, so use at your own risk.
As always, if you'd like to see this become part of the UIKit API surface, file a feedback!
Until next time...
