One of my favourite things to do as an iOS developer is to find great user interfaces across Apple's platforms and try to recreate or reverse engineer them. I did this not so long ago with Apple Music's Now Playing UI, complete with a custom view controller transition.
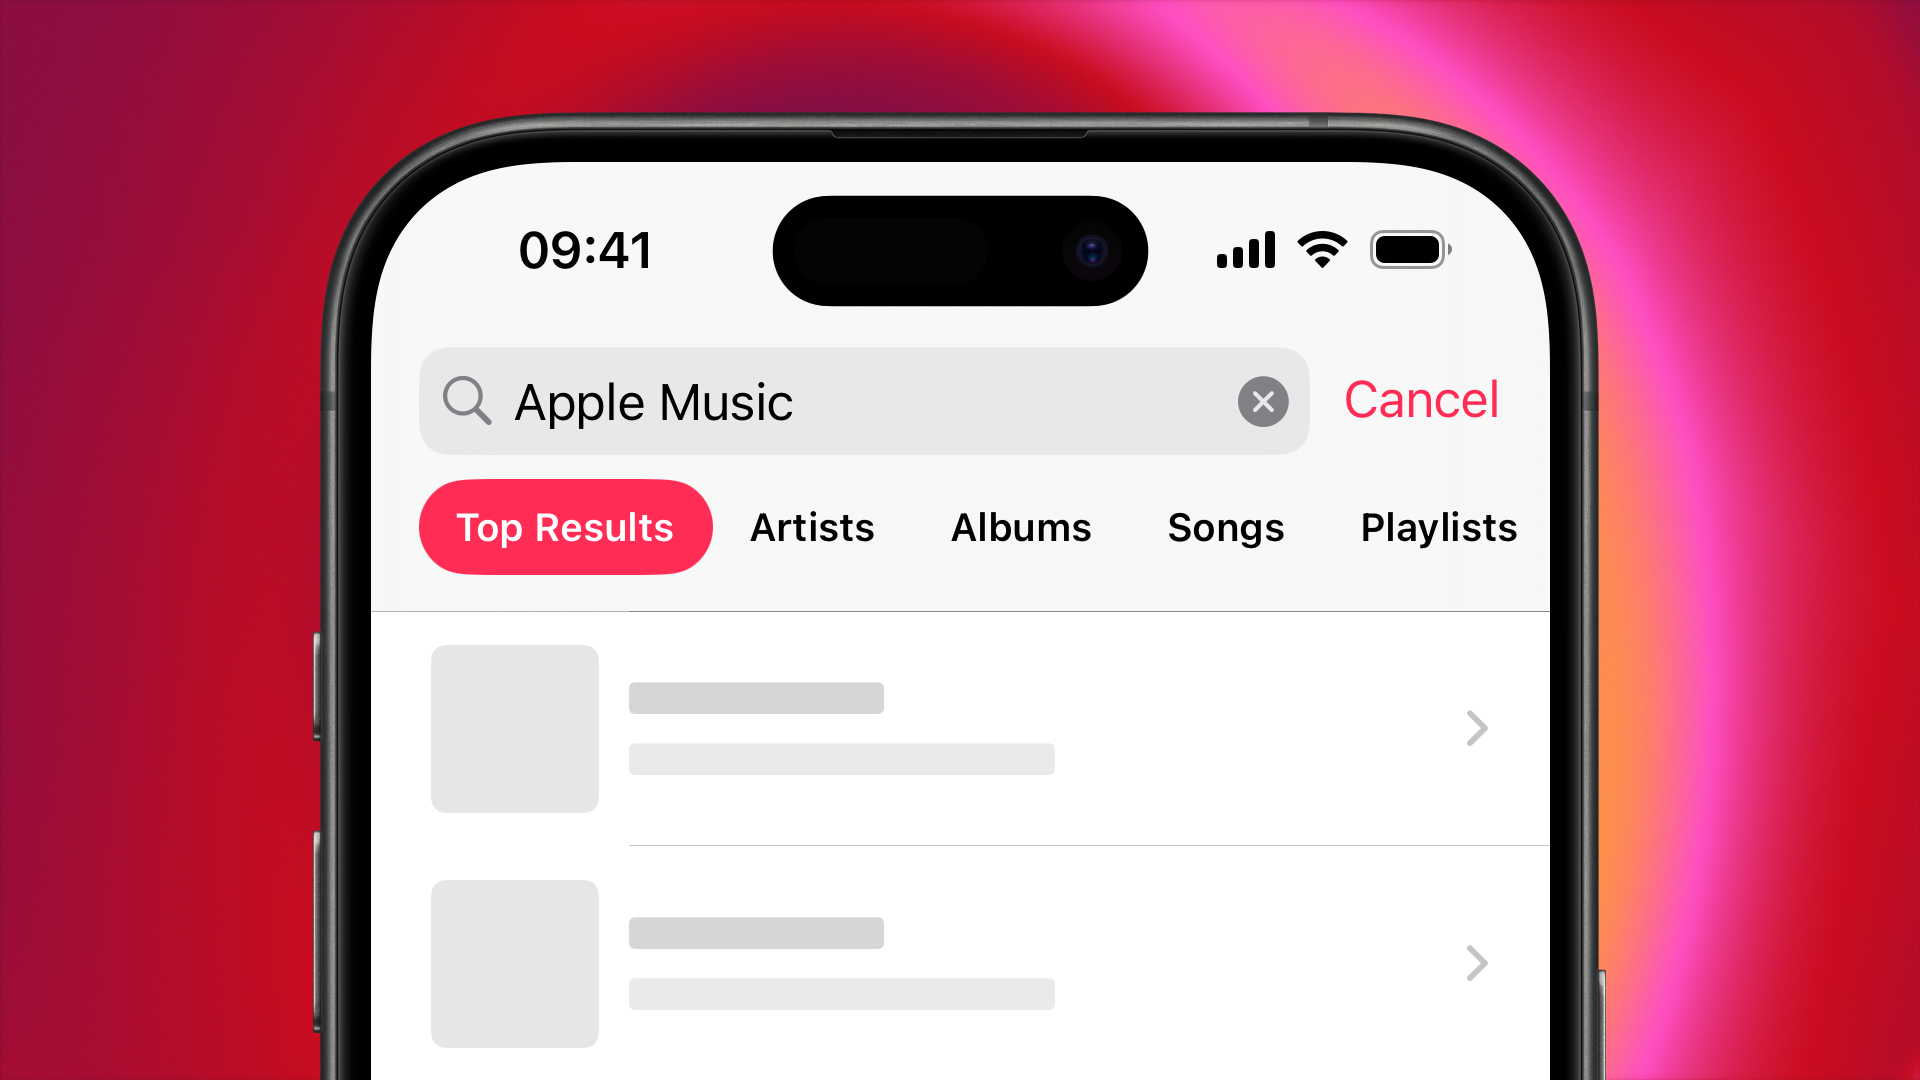
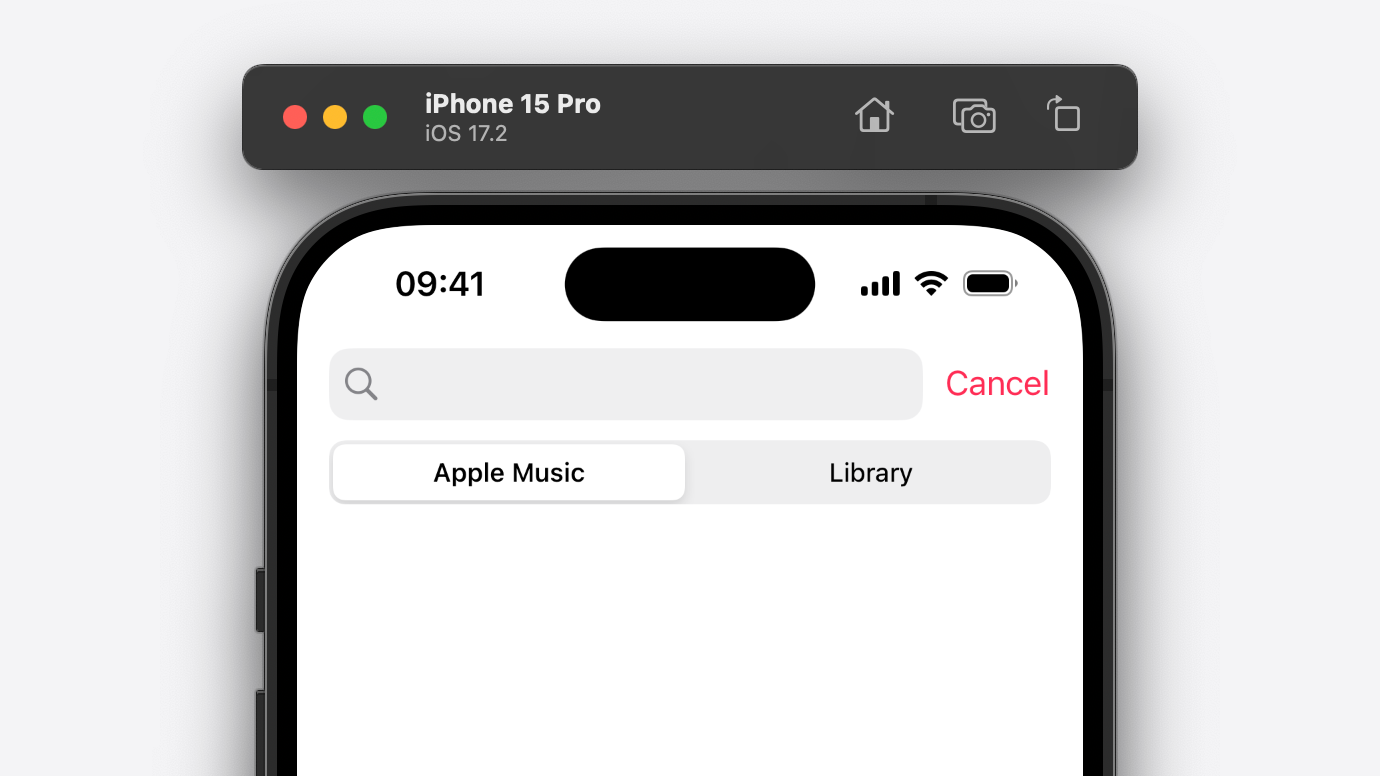
However, this isn't the only standout design pattern in the Music app. Another feature that caught my eye was the "search chips" in the Search tab. The chips, or tags as I'll refer to them from here on out, appear underneath the search bar, where the scope bar normally sits, appearing after the user performs a search. When the search is performed, the scope bar fades out, while the search tags fade in. The animation reverses when the search bar is focused again. Let's take a look at what that looks like inside the Apple Music app...
You could achieve something similar to this with a cell at the top of your list containing your search tags, but this isn't a great user experience as, if the user has scrolled down the list, the search tags are no longer accessible. Plus, it ain't how Apple do it, so it's not how I'm gonna do it either!
Getting Started
First things first, we need to assess what Apple are probably doing here. Given that Music isn't available on the Xcode Simulator, we can't easily attach to the process and inspect the view hierarchy. If you have a jailbroken device, you could use a tool like FLEX to pick apart the view hierarchy on device but, alas, I do not - so I'm just going to take my best guess.
The good news is, most of this UI can be built with very public, very well documented APIs. For the basic search functionality, we can rely on UISearchController. However, in this article, we'll be getting our hands a little dirty modifying view hierarchies that we don't own - a practice that your favourite Apple engineer on Twitter would probably recommend against. Why are we doing that? Well, it turns out that there is no API, private or otherwise, to manipulate the navigation bar, where the search bar sits, in such a way so that we can replace its scope bar with a custom view.
So, to get started, let's create a new Xcode project and get shot of Main.storyboard. We're going to initialise our UIWindow programmatically, with a UINavigationController as our window's root view controller, and Xcode's auto-generated ViewController class as our navigation controller's root view.

class SceneDelegate :UIResponder ,UIWindowSceneDelegate {
var window :UIWindow ?
func scene (_ scene:UIScene ,willConnectTo session:UISceneSession ,options connectionOptions:UIScene .ConnectionOptions ) {
guard let windowScene = sceneas ?UIWindowScene else {return }
let rootViewController =ViewController ()
let navigationController =UINavigationController (rootViewController : rootViewController)
let window =UIWindow (windowScene : windowScene)
window.rootViewController = navigationController
window.tintColor = .systemPink
window.makeKeyAndVisible ()
self .window = window
}
}
From here, we need to set up our view controller's navigation item with a title and search controller.
class ViewController :UIViewController {
override func viewDidLoad () {
super .viewDidLoad ()
let searchController =UISearchController ()
searchController.scopeBarActivation = .onSearchActivation
searchController.searchBar .scopeButtonTitles = ["Apple Music" ,"Library" ]
navigationItem .searchController = searchController
navigationItem .title ="Search"
}
}
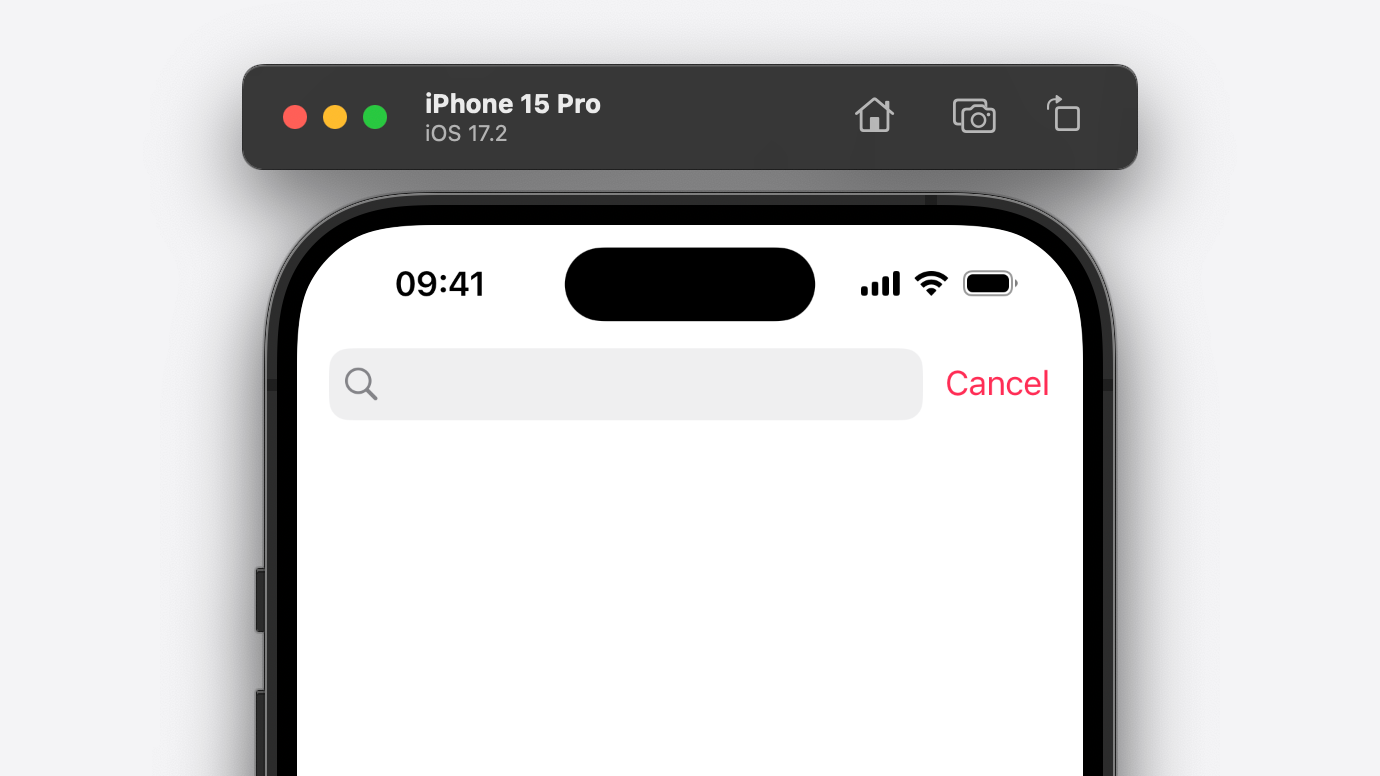
If we build and run our project, things are starting to take shape.
Having done this, we can use Xcode's Debug View Hierarchy feature to take a look at where we could insert our custom UI. We'll do this with the search bar focused as, in Apple Music, the tags appear in place of the scope bar which is only visible while the search bar's underlying UISearchBarTextField is the first responder.
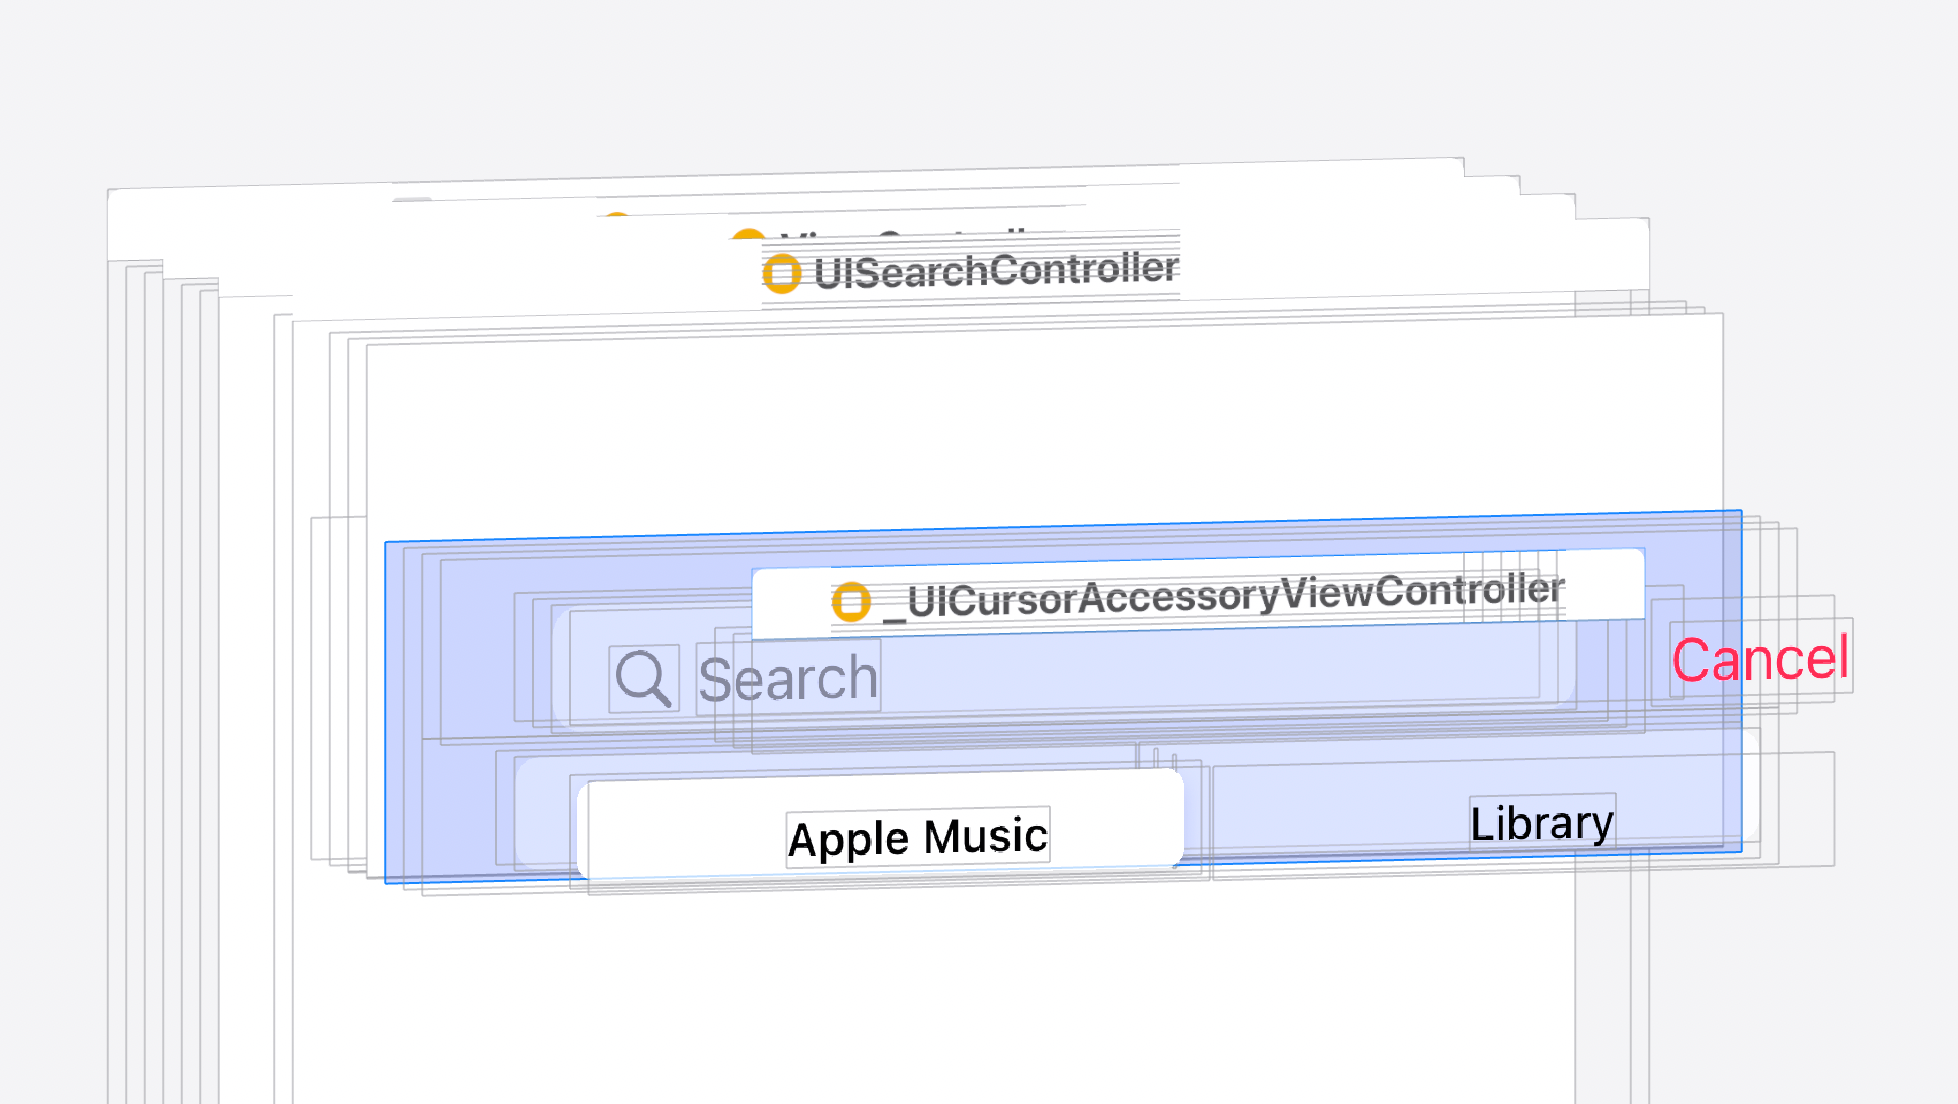
If we select the search bar, we can see that it has a single subview of type UIView, not very interesting in and of itself. However, this view has several subviews of its own that are of interest - those being UISearchBarBackground, _UISearchBarSearchContainerView and _UISearchBarScopeContainerView. The last of which, _UISearchBarScopeContainerView, is of particular interest to us as this is the view that houses the scope bar, a UISegmentedControl, which we want to conditionally show and hide.
I'm going to cut to the chase here as I wasted many hours mucking around with this so that you don't have to. UIKit does a lot of trickery under the hood to manage the state of this segmented control, and at funny times of the view lifecycle too. We could write a bunch of combative code to work around this, relying on our trusty friend DispatchQueue.main.async(execute:), but it's going to get very messy, very quickly. Instead, we're just going to hide the system's scope bar and substitute it with our own.
To do that, we're going to create a UISearchBar subclass that overrides the didMoveToSuperview() method. When this method is called, we'll hide the search bar's scope bar, and add our segmented control that we can manage ourselves. The question is, how do we retrieve the scope bar to hide it? Well, it's actually pretty simple! It turns out UISearchBar has a private _scopeBar method that returns just that! We can write a quick extension to retrieve the value that this method returns.
extension UISearchBar {
var scopeBar :UIView ? {
let selector =NSSelectorFromString ("_scopeBar" )
guard responds (to : selector)else {return nil }
return value (forKey :"_scopeBar" )as ?UIView
}
}
So, what's going on here? First, we create a Selector from a string, a selector being a unique identifier that represents the name of an Objective-C method. After that, we check that UISearchBar actually responds to said selector. This is an important step as the method we're calling is undocumented, meaning it's liable to change or be removed entirely in the future. Finally, we call value(forKey:) on our instance of UISearchBar and try to cast the returned value, if any, to the type of UIView.
Having done that, we can create our UISearchBar subclass and override the didMoveToSuperview() method, setting the scope bar's isHidden property to true.
class TaggedSearchBar :UISearchBar {
override func didMoveToSuperview () {
super .didMoveToSuperview ()
scopeBar ?.isHidden =true
}
}
The reason we do this in didMoveToSuperview() and not in init(frame:) is that the scope bar is initialised lazily. It's only created after the search bar has been added to the view hierarchy.
If we build and run our project now, nothing changes. This is because UISearchController knows nothing about our TaggedSearchBar class. In order to use our custom search bar in place of the default search bar, Apple suggests we create a UISearchController subclass and override its searchBar property, returning our own instance of some UISearchBar subclass.
class TaggedSearchController :UISearchController {
private lazy var _searchBar =TaggedSearchBar ()
override var searchBar :TaggedSearchBar {
return _searchBar
}
}
The last thing we need to do is update our code in ViewController.swift to assign an instance of our new UISearchController subclass to the navigation item's searchController property.
class ViewController :UIViewController {
override func viewDidLoad () {
super .viewDidLoad ()
let searchController =TaggedSearchController ()
searchController.scopeBarActivation = .onSearchActivation
searchController.searchBar .scopeButtonTitles = ["Apple Music" ,"Library" ]
navigationItem .searchController = searchController
navigationItem .title ="Search"
}
}
If we build and run, and focus the search bar, the scope bar is indeed hidden. So, let's get to work adding our own scope bar.
Scoping Things Out
The first thing we want to do is add a new, private property to our TaggedSearchBar class called segmentedControl. We'll also add two new methods called setupSegmentedControl() and segmentedControlValueChanged(_:). The first method, setupSegmentedControl(), will initialise a new instance of UISegmentedControl, assign it to our segmentedControl property, and add an action to be performed when the selected segment index changes. The second method, segmentedControlValueChanged(_:), will call the search bar's delegate to tell it that the selected scope button index changed. Here's what that looks like...
class TaggedSearchBar :UISearchBar {
private var segmentedControl :UISegmentedControl !
private func setupSegmentedControl () {
segmentedControl =UISegmentedControl ()
segmentedControl .addTarget (self ,action :#selector (segmentedControlValueChanged ),for : .valueChanged )
}
@objc private func segmentedControlValueChanged (_ sender:UISegmentedControl ) {
delegate ?.searchBar ?(self ,selectedScopeButtonIndexDidChange : sender.selectedSegmentIndex )
}
}
Having done this, we'll need to call our new setupSegmentedControl() method from a custom implementation of the init(frame:) initialiser. Overriding the aforementioned initialiser will also require us to implement init(coder:), but we're not going to use that so we can rely on Xcode's default implementation.
class TaggedSearchBar :UISearchBar {
// ...
override init (frame :CGRect ) {
super .init (frame : frame)
setupSegmentedControl ()
}
required init ?(coder :NSCoder ) {
fatalError ("init(coder:) has not been implemented" )
}
// ...
}
We'll also need to add our segmented control to the view hierarchy. We want to add it as a subview of the original scope bar's superview as UIKit animates this view in and out during view controller transitions and we want to take advantage of this behaviour. Earlier, when we inspected the original view hierarchy using Xcode, we saw that the scope bar was a subview of a view of type _UISearchBarScopeContainerView. We can retrieve this view using a similar extension to the one we used to retrieve the scope bar...
extension UISearchBar {
var scopeBarContainerView :UIView ? {
let selector =NSSelectorFromString ("_scopeBarContainerView" )
guard responds(to: selector)else {return nil }
return value (forKey :"_scopeBarContainerView" )as ?UIView
}
}
Much like the scope bar, the scope bar container view is initialised lazily, so we can't call its addSubview(_:) method at the time of initialising our segmented control as the scopeBarContainerView property will return nil. So, we'll update TaggedSearchBar's didMoveToSuperview method and add our segmented control to the scope bar container view there, when we know the container view has been initialised.
class TaggedSearchBar :UISearchBar {
// ...
override func didMoveToSuperview () {
super .didMoveToSuperview ()
scopeBar ?.isHidden =true
scopeBarContainerView ?.addSubview (segmentedControl )
}
// ...
}
This is a good start, but if we build and run our app now, we still won't see our custom scope bar. This is because we initialised our segmented control using NSObject's init() initialiser, rather than UIView's init(frame:). This is by design as, at this point, we don't know what size our scope bar should be. To solve this, we'll override the layoutSubviews() method and set the frame of segmentedControl to be equal to that of the original scopeBar's.
class TaggedSearchBar :UISearchBar {
// ...
override func layoutSubviews () {
super .layoutSubviews ()
layoutSegmentedControl ()
}
private func layoutSegmentedControl () {
if let scopeBar {
segmentedControl .frame =scopeBar.frame
}
}
}
Note
I've stuck the logic for setting the segmented control's frame in a separate method,layoutSegmentedControl(), because the logic for this will get a little more complex when we conditionally show or hide our search tags later. There is one last thing to do before we'll see our scope bar appear. Earlier, in ViewController.swift, we initialised an instance of TaggedSearchController and set its searchBar's scopeButtonTitles property. This will have updated the original scopeBar but not our custom segmentedControl. All we need to do is override TaggedSearchBar's scopeButtonTitles property, and, when the property is set, update our segmented control accordingly.
To keep the implementation of TaggedSearchBar clean, we'll create an extension of UISegmentedControl with a method called setTitles(_:). This method will accept an array of strings, iterate over those strings, and call UISegmentedControl's insertSegment(withTitle:at:animated:) method. We'll also handle a nil value, calling UISegmentedControl's removeAllSegments() method if needed.
extension UISegmentedControl {
func setTitles (_ titles: [String ]?) {
if let titles {
for titlein titles.reversed () {
insertSegment (withTitle : title,at :0 ,animated :false )
}
selectedSegmentIndex =0
}else {
removeAllSegments ()
}
}
}
Now, we'll update TaggedSearchBar, overriding its scopeButtonTitles property.
class TaggedSearchBar :UISearchBar {
// ...
override var scopeButtonTitles : [String ]? {
didSet {
segmentedControl .setTitles (scopeButtonTitles )
}
}
// ...
}
Now, if we build and run, we're essentially back to square one. Tapping on the search bar focusses it, and our custom segmented control takes the place of the original scope bar. From here, we're free to customise our new scope bar to our heart's content, without having to worry about UIKit interfering with our changes.
Onwards and Upwards
Our next job is to manipulate our segmented control so that we can show and hide it to make room for our search tags. To do this, we could just use its isHidden property that it inherits from UIView, but this won't achieve the elegant animation we see in Apple Music. Instead, we'll set its frame and alpha properties to change the y position and opacity, respectively. We'll start by adding a new Boolean property to TaggedSearchBar called showsTags using the didSet property observer to call layoutSegmentedControl() when the property's value changes.
class TaggedSearchBar :UISearchBar {
// ...
var showsTags :Bool =false {
didSet {
layoutSegmentedControl ()
}
}
// ...
}
Now, we'll update the layoutSegmentedControl() method to conditionally set the segmented control's frame and opacity, depending on the value of showsTags.
class TaggedSearchBar :UISearchBar {
// ...
private func layoutSegmentedControl () {
if let scopeBar {
segmentedControl .frame .size = scopeBar.frame .size
segmentedControl .frame .origin .x = scopeBar.frame .origin .x
segmentedControl .frame .origin .y =showsTags ? -scopeBar.frame .height : scopeBar.frame .origin .y
segmentedControl .alpha =showsTags ?0 :1
}
}
}
Now, if we set the search bar's showsTags property to true inside a (temporary) UIView.animate(withDuration:animations:) block, we can see the segmented control fade out and slide upwards.
Tagging Along
We're well on our way to recreating the Apple Music search tags UI, but there's one not-insignificant job remaining...building the search tags. This is a relatively simple task, but there's an interesting challenge that we'll have to tackle later on...
The search tags view comprises of a horizontally scrolling list of buttons, one of which is highlighted with a tinted pill shape behind it to indicate that the respective tag has been selected. To get started, we'll create a new UIScrollView subclass called TagsView. We'll define a new method called setupScrollView(), which will configure a few properties of the scroll view, and call that method from a custom implementation of init(frame:).
class TagsView :UIScrollView {
override init (frame :CGRect ) {
super .init (frame : frame)
setupScrollView ()
}
required init ?(coder :NSCoder ) {
fatalError ("init(coder:) has not been implemented" )
}
private func setupScrollView () {
alwaysBounceHorizontal =true
showsHorizontalScrollIndicator =false
}
}
As always, if we override the init(frame:) initialiser, we'll have to implement init(coder:). Again, we can just rely on Xcode's default implementation here which is to raise a fatal error.
The scroll view properties that we configure are quite self-explanatory but, for the sake of completeness, we'll briefly go over them...
- Setting
alwaysBounceHorizontaltotrueallows the scroll view to scroll even if its content size is smaller than the frame of the scroll view, although it will rubber-band back to a content offset of zero. - Setting
showsHorizontalScrollIndicatortofalsewill cause the system's horizontal scroll bar to always be hidden, regardless of whether or not the user is scrolling.
Next on the agenda is to set up a series of buttons that will act as the actual tags. We can do this by creating UIButtons and adding them as arranged subviews of a horizontal UIStackView. UIScrollView and UIStackView work really nicely together, so we don't need to write any code to layout our subviews or to configure the scroll view's content size.
There is one consideration we need to make, however, and that is selection. As per the Apple Music UI, our search tags need to be selectable; so we'll have to highlight one search tag at a time, based on user input. One way we could do this is by setting the selected button's configuration.baseBackgroundColor to some UIColor, simultaneously setting all the other buttons' background color to nil. This would work fine, but check out this subtle detail of the original Apple Music UI...
As the selected search tags changes, the text colour of the outgoing and incoming selected tag transitions, masked to coloured pill. We can achieve this effect using UIView's mask property. Here's a breakdown of the components we'll use to achieve this effect...
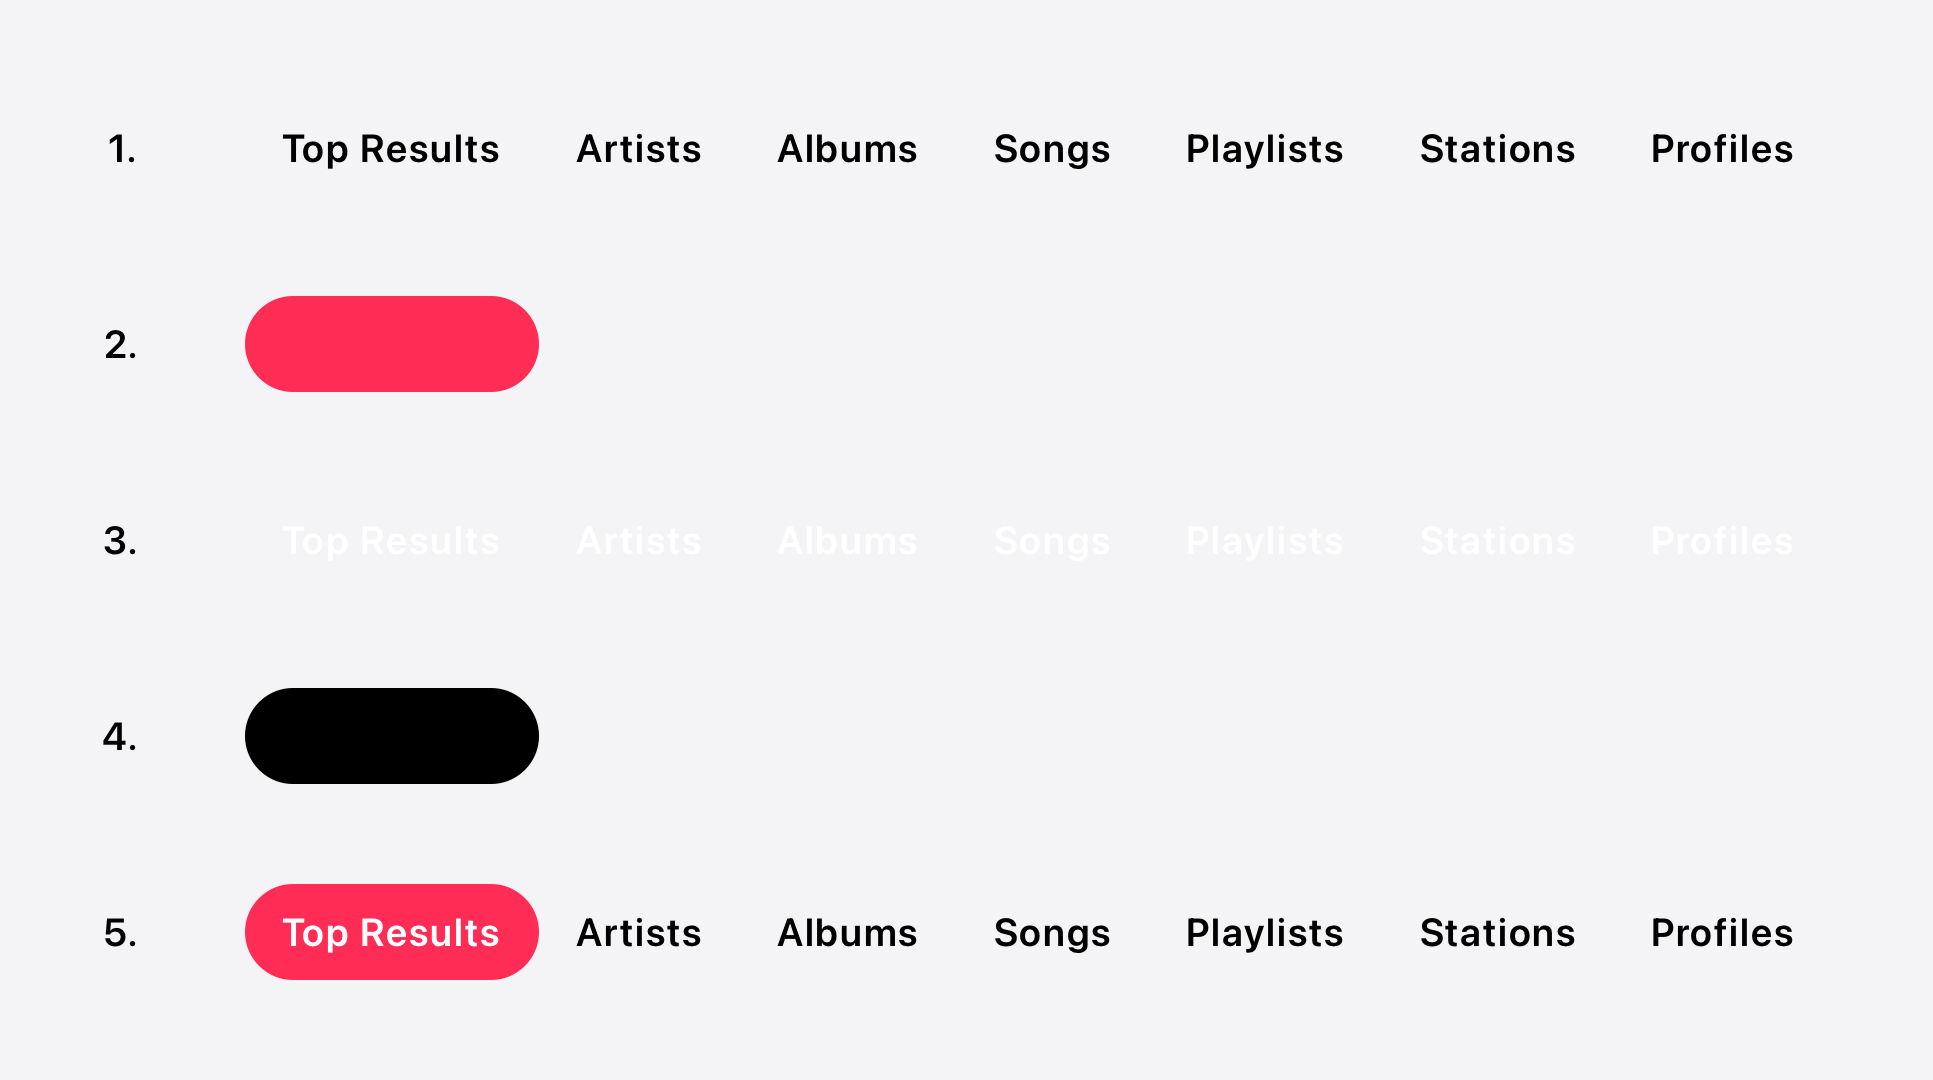
- A horizontal stack view of buttons with a text color of
UIColor.label. - A pill-shaped view with a background color of
UIColor.tintColor. - A second, horizontal stack view of buttons with a text color of
UIColor.white. - A pill-shaped view with a background color of
UIColor.blackto be used as the second stack view's mask. - The result of layering the first stack view, the tinted pill-shaped view and the second stack view with its mask applied.
Let's get stuck in. We'll start by creating two new properties, bottomStackView and topStackView, and two new methods, setupBottomStackView() and setupTopStackView(). We'll update our init(frame:) initialiser to call the two new methods, after setupScrollView().
class TagsView :UIScrollView {
private var bottomStackView :UIStackView !
private var topStackView :UIStackView !
override init (frame :CGRect ) {
super .init (frame : frame)
setupScrollView ()
setupBottomStackView ()
setupTopStackView ()
}
// ...
private func setupBottomStackView () {
bottomStackView =UIStackView ()
bottomStackView .axis = .horizontal
bottomStackView .distribution = .fillProportionally
bottomStackView .translatesAutoresizingMaskIntoConstraints =false
addSubview (bottomStackView )
NSLayoutConstraint .activate ([
bottomStackView .topAnchor .constraint (equalTo :topAnchor ),
bottomStackView .leadingAnchor .constraint (equalTo :leadingAnchor ),
bottomStackView .trailingAnchor .constraint (equalTo :trailingAnchor ),
bottomStackView .bottomAnchor .constraint (equalTo :bottomAnchor )
])
}
private func setupTopStackView () {
topStackView =UIStackView ()
topStackView .axis = .horizontal
topStackView .isUserInteractionEnabled =false
topStackView .distribution = .fillProportionally
topStackView .translatesAutoresizingMaskIntoConstraints =false
addSubview (topStackView )
NSLayoutConstraint .activate ([
topStackView .topAnchor .constraint (equalTo :topAnchor ),
topStackView .leadingAnchor .constraint (equalTo :leadingAnchor ),
topStackView .trailingAnchor .constraint (equalTo :trailingAnchor ),
topStackView .bottomAnchor .constraint (equalTo :bottomAnchor )
])
}
}
Important
The second stack view,topStackView, has its isUserInteractionEnabled property set to false. This is an important step as, for reasons that will become apparent shortly, the buttons arranged inside this stack view should be purely decorative. By disabling user interaction on this stack view, it ignores all touch events and therefore they're received by the first stack view underneath, bottomStackView. The next thing we need to do is add buttons to the stack views, but these need to be dynamic. So, let's create a new property called titles with a didSet property observer that will call a new method called updateButtons(with:).
class TagsView :UIScrollView {
// ...
var titles : [String ] = [] {
didSet {updateButtons (with :titles ) }
}
// ...
private func updateButtons (with titles: [String ]) {
}
}
The updateButtons(with:) method needs to do a couple of things...
- Remove all existing buttons from both the top and bottom stack views.
- Add a new button for each title in the
titlesarray to both the top and bottom stack views.
Here's what that looks like...
class TagsView :UIScrollView {
// ...
private func updateButtons (with titles: [String ]) {
bottomStackView .arrangedSubviews .forEach { subviewin
subview.removeFromSuperview ()
}
topStackView .arrangedSubviews .forEach { subviewin
subview.removeFromSuperview ()
}
for titlein titles {
let bottomButton =button (with : title,foregroundColor : .label )
bottomStackView .addArrangedSubview (bottomButton)
let topButton =button (with : title,foregroundColor : .white )
topStackView .addArrangedSubview (topButton)
}
}
}
Eagle-eyed readers will have noticed a call to a function that we've not yet defined, button(with:foregroundColor:). This is a function that creates and returns a new UIButton with the specified title. Here's the implementation...
class TagsView :UIScrollView {
// ...
private func button (with title:String ,foregroundColor :UIColor ) ->UIButton {
let titleTextAttributesTransformer =UIConfigurationTextAttributesTransformer { containerin
var container = container
container.font =UIFont .systemFont (ofSize :13 ,weight : .semibold )
return container
}
let button =UIButton (type : .system)
button.configuration = .plain ()
button.configuration ?.title = title
button.configuration ?.cornerStyle = .capsule
button.configuration ?.baseForegroundColor = foregroundColor
button.configuration ?.titleTextAttributesTransformer = titleTextAttributesTransformer
button.configuration ?.contentInsets =NSDirectionalEdgeInsets (top :8.33 ,leading :12 ,bottom :8 ,trailing :12.66 )
button.addTarget (self ,action :#selector (tagButtonTapped ),for : .touchUpInside )
return button
}
@objc private func tagButtonTapped (_ sender:UIButton ) {
}
}
We also added a tagButtonTapped(_:) method here, which we added as a target of our button. We'll circle back to this however, as we still need to implement our pill-shaped background view and mask view. But, before we do that, let's check in on progress. We can use the new Preview(body:) macro, introduced in iOS 17, to see what we've built so far.
#Preview {
let tagsView =TagsView ()
tagsView.tintColor = .systemPink
tagsView.titles = ["Top Results" ,"Artists" ,"Albums" ,"Songs" ,"Playlists" ,"Stations" ,"Profiles" ]
return tagsView
}
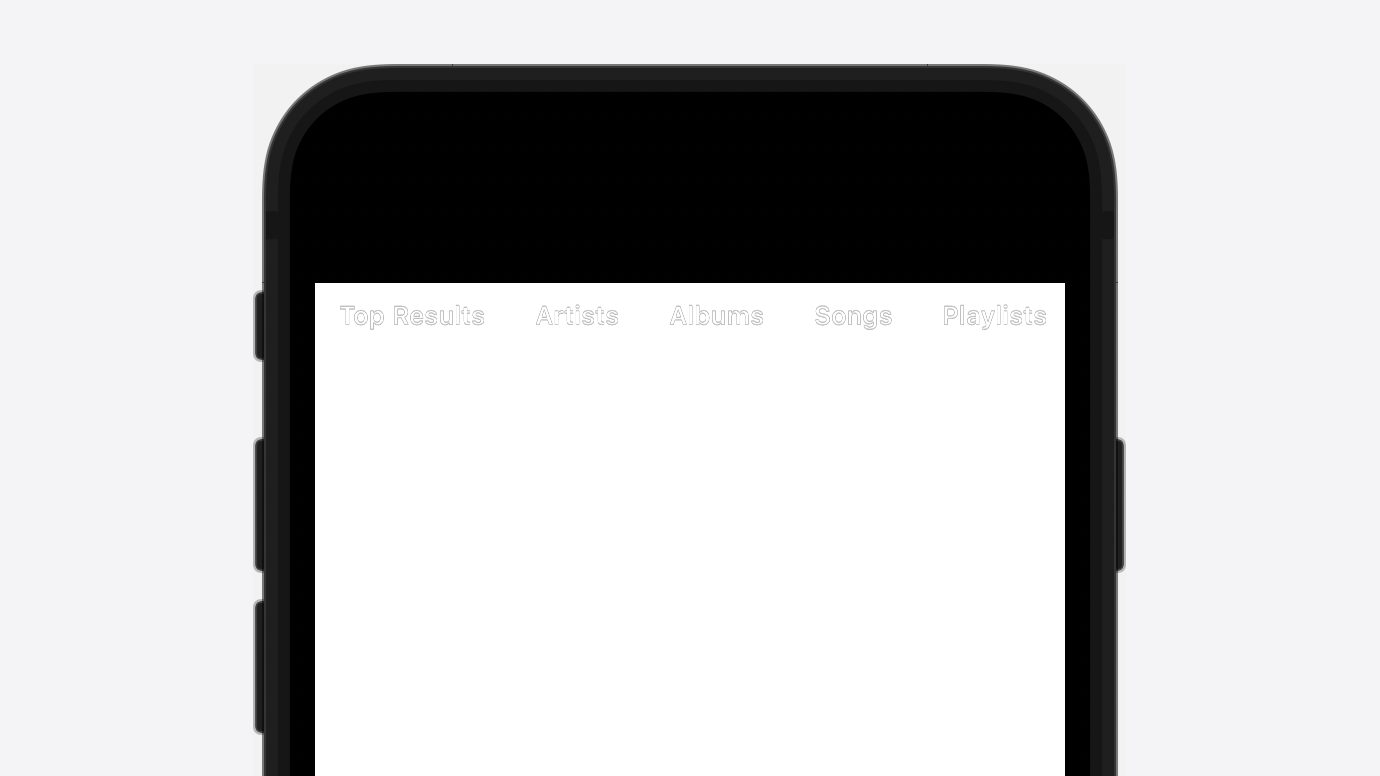
This is...progress, but a far cry from Apple Music. We'll continue by building our pill-shaped background view. We need to create a new property called backgroundView and a new method called setupBackgroundView(). We'll also call setupBackgroundView() from our init(frame:) method.
class TagsView :UIScrollView {
// ...
private var backgroundView :UIView !
// ...
override init (frame :CGRect ) {
super .init (frame : frame)
setupScrollView ()
setupBottomStackView ()
setupTopStackView ()
setupBackgroundView ()
}
// ...
private func setupBackgroundView () {
backgroundView =UIView ()
backgroundView .clipsToBounds =true
backgroundView .backgroundColor = .tintColor
backgroundView .layer .cornerCurve = .continuous
insertSubview (backgroundView ,aboveSubview :bottomStackView )
}
// ...
}
At the moment, our preview won't have updated, at least not visibly. This is because backgroundView's frame is zero. So, obviously, we need to set the background view's frame. However, the frame of this view should be dependant on which tag is currently selected, so we need to keep track of the selected tag's index.
Let's create a new property in TagsView called selectedTagIndex of type Int. Again, we'll add a didSet property observer which will call a new method called updateSelection(for:). This method will get the button in the bottom stack view's arrangedSubviews array at the given index, and set backgroundView's frame to be that of the retrieved button.
class TagsView :UIScrollView {
// ...
var selectedTagIndex :Int =0 {
didSet {updateSelection (for :selectedTagIndex ) }
}
// ...
private func updateSelection (for selectedTagIndex:Int ) {
if bottomStackView .arrangedSubviews .indices .contains (selectedTagIndex) {
let button =bottomStackView .arrangedSubviews [selectedTagIndex]
backgroundView .layer .cornerRadius = button.frame .height /2
backgroundView .frame = button.frame
}
}
}
Note that we also set the tag mask view's layer.cornerRadius property. We set it to be half of the height of the selected button, giving it that distinct pill shape.
Right now, the frame of the background view won't be set unless we specifically set TagView's selectedTagIndex property. To fix this, we can override TagView's layoutSubviews() method to call our updateSelection(for:) function.
class TagsView :UIScrollView {
// ...
override func layoutSubviews () {
super .layoutSubviews ()
UIView .performWithoutAnimation { [unowned self ]in
updateSelection (for :selectedTagIndex )
}
}
}
I've wrapped the call to updateSelection(for:) in a UIView.performWithoutAnimation(_:) block to avoid any implicit animation funkiness we might be subject to when our tags view is laid out by UIKit's layout system. Let's take another look at our preview...
We're getting there! To complete the look, we need to implement the top stack view's mask. To do that, we'll once again create a new property of TagsView and a new method, tagMaskView and setupTagMaskView() respectively. And, you guessed it, we'll call the new setupTagMaskView() from our init(frame:) initialiser.
class TagsView :UIScrollView {
// ...
private var tagMaskView :UIView !
// ...
override init (frame :CGRect ) {
super .init (frame : frame)
setupScrollView ()
setupBottomStackView ()
setupTopStackView ()
setupBackgroundView ()
setupTagMaskView ()
}
// ...
private func setupTagMaskView () {
tagMaskView =UIView ()
tagMaskView .clipsToBounds =true
tagMaskView .backgroundColor = .black
tagMaskView .layer .cornerCurve = .continuous
topStackView .mask =tagMaskView
}
// ...
}
Like with our background view, we'll need to lay out the mask view manually. Fortunately, the code here is identical to that which we wrote for our background view. So, let's update our updateSelection(for:) method...
class TagsView :UIScrollView {
// ...
private func updateSelection (for selectedTagIndex:Int ) {
if bottomStackView .arrangedSubviews .indices .contains (selectedTagIndex) {
let button =bottomStackView .arrangedSubviews [selectedTagIndex]
backgroundView .layer .cornerRadius = button.frame .height /2
backgroundView .frame = button.frame
tagMaskView .layer .cornerRadius = button.frame .height /2
tagMaskView .frame = button.frame
}
}
// ...
}
Quick progress check...

Looking good!
OK, back to our empty tagButtonTapped(_:) function! Remember that...? All we need to do here is get the index of our tapped button in its stack view's arrangedSubviews array, and assign that value to our selectedTagIndex property inside a UIView.animate(springDuration:bounce:) method. Simple!
class TagsView :UIScrollView {
// ...
@objc private func tagButtonTapped (_ sender:UIButton ) {
UIView .animate (springDuration :0.25 ,bounce :0.25 ) {
selectedTagIndex =bottomStackView .arrangedSubviews .firstIndex (of : sender)!
}
}
// ...
}
This works because we have our didSet property observer on selectedTagIndex, which automatically calls our updateSelection(for:) method.
This is also why we set our topStackView's isUserInteractionEnabled property to false. When the tagButtonTapped(_:) method is called, we're guaranteed that the sender will be a subview of bottomStackView.
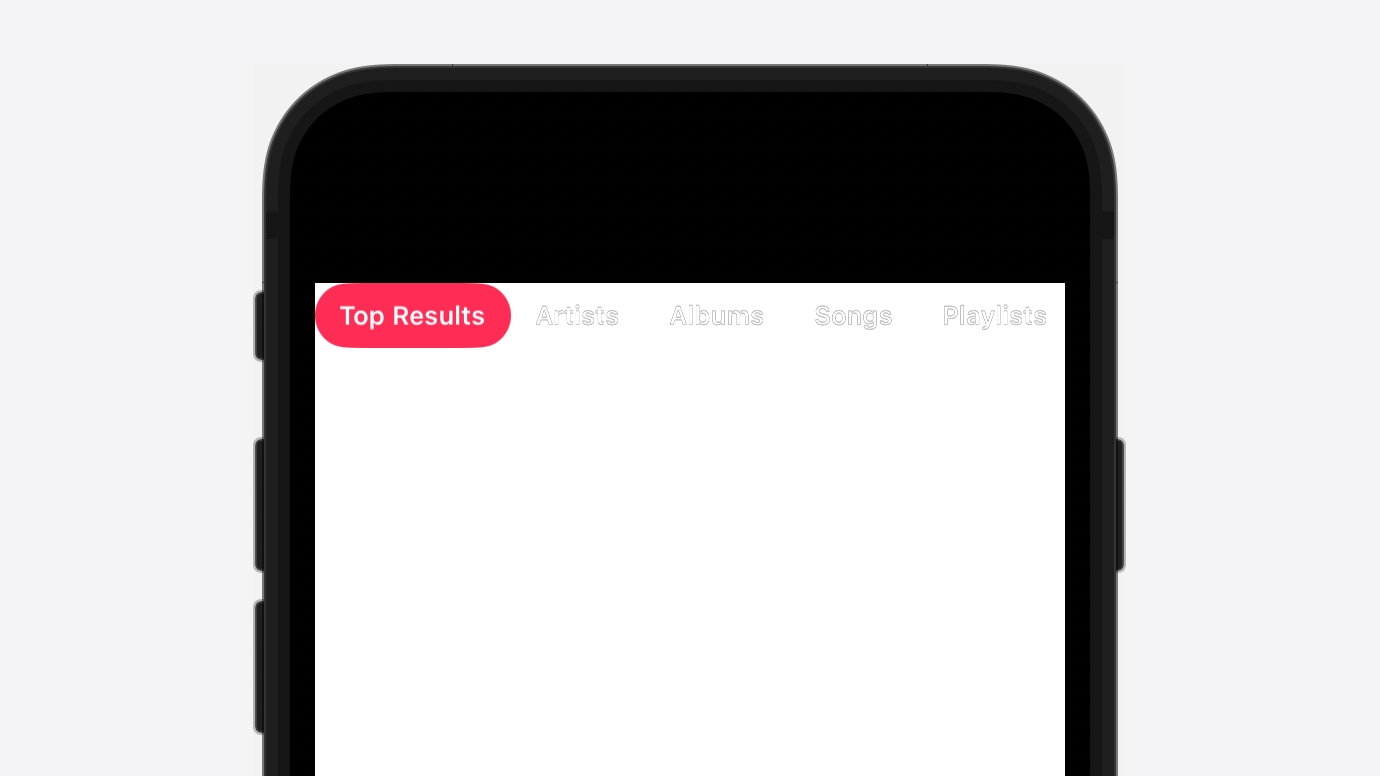
Let's check back in on that preview...
I'm pretty happy with this!
Back to Basics
With the complexity of our tags view out of the way, we just need to update TaggedSearchBar so that we add an instance of TagsView to our view hierarchy. Then, we need to lay the tags view out appropriately, and show and hide it depending on the showsTags property we defined earlier. This code will be almost identical to that relating to our custom scope bar, segmentedControl.
We'll start by defining a new property in TagsView called tagsView and a new method called setupTagsView(). We'll update the init(frame:) initialiser to call the new setupTagsView() method.
class TaggedSearchBar :UISearchBar {
// ...
private var tagsView :TagsView !
// ...
override init (frame :CGRect ) {
super .init (frame : frame)
setupSegmentedControl ()
setupTagsView ()
}
// ...
private func setupTagsView () {
tagsView =TagsView ()
tagsView .alpha =0
}
// ...
}
Next, we'll need to update our implementation of didMoveToSuperview() so that we also add our tags view as a subview of the scope bar container view.
class TaggedSearchBar :UISearchBar {
// ...
override func didMoveToSuperview () {
super .didMoveToSuperview ()
scopeBar ?.isHidden =true
scopeBarContainerView ?.addSubview (segmentedControl )
scopeBarContainerView ?.addSubview (tagsView )
}
// ...
}
Having done this, we'll need to layout out our tags view. We'll create a new method called layoutTagsView() and call it from our implementation of layoutSubviews().
class TaggedSearchBar :UISearchBar {
// ...
override func layoutSubviews () {
super .layoutSubviews ()
layoutSegmentedControl ()
layoutTagsView ()
}
// ...
private func layoutTagsView () {
if let scopeBarContainerView {
tagsView .frame .size = scopeBarContainerView.frame .size
tagsView .frame .origin .x =0
tagsView .frame .origin .y =showsTags ?0 : scopeBarContainerView.frame .height
tagsView .alpha =showsTags ?1 :0
}
}
}
Much like in our implementation of layoutSegmentedControl(), the y position of the view we're laying out is dependant on the showsTags property. However, this time, we're showing the view when showsTags is true, instead of false.
We also need to update the didSet property observer of the showsTags property.
class TaggedSearchBar :UISearchBar {
// ...
var showsTags :Bool =false {
didSet {
layoutSegmentedControl ()
layoutTagsView ()
}
}
// ...
}
While we're here, we need to add a quick passthrough property for tagsView's titles property as tagsView itself is private and we need a clean, public interface for setting tag titles.
class TaggedSearchBar :UISearchBar {
// ...
var tagTitles : [String ] {
get {
return tagsView .titles
}set {
tagsView .titles = newValue
}
}
// ...
}
Wrapping Up
As a final, somewhat optional step, we need to write some logic that shows and hides the scope bar, in favour of our tags view. In Apple Music, the scope bar is visible while the search bar text field is focused, the tags only appearing once you perform a search and the search bar text field has resigned its first responder status.
To do this, we're going to go back to our root view controller and add two new properties, searchController and isCancelling. The first property will hold a strong reference to our instance of TaggedSearchController so we can access it outside of our viewDidLoad() method. The second property will store a Boolean value, indicating whether the user has tapped the search bar's cancel button.
class ViewController :UIViewController ,UISearchBarDelegate {
private var searchController :TaggedSearchController !
private var isCancelling :Bool =false
// ...
}
We'll also update our implementation of viewDidLoad() so that we assign the instance of TaggedSearchController to our new searchController property, instead of a local variable. While we're here, we'll also set the searchController.searchBar's delegate and tagTitles properties. Setting the search bar's delegate property to self will also require us to add UISearchBarDelegate protocol conformance to our ViewController class.
class ViewController :UIViewController ,UISearchBarDelegate {
// ...
override func viewDidLoad () {
super .viewDidLoad ()
searchController =TaggedSearchController ()
searchController .scopeBarActivation = .onSearchActivation
searchController .searchBar .delegate =self
searchController .searchBar .scopeButtonTitles = ["Apple Music" ,"Library" ]
searchController .searchBar .tagTitles = ["Top Results" ,"Artists" ,"Albums" ,"Songs" ,"Playlists" ,"Stations" ,"Profiles" ]
navigationItem .searchController =searchController
navigationItem .title ="Search"
}
// ...
}
Now, we're going to implement three UISearchBarDelegate methods...
searchBarTextDidBeginEditing(_:)searchBarTextDidEndEditing(_:)searchBarCancelButtonClicked(_:)
Let's start with 1, searchBarTextDidBeginEditing(_:). This method gets called whenever the search bar's underlying text field becomes focused. When this happens, we want to set the search bar's showsTags property to false, inside a UIView.animate(withDuration:animations:) block.
class ViewController :UIViewController ,UISearchBarDelegate {
// ...
func searchBarTextDidBeginEditing (_ searchBar:UISearchBar ) {
isCancelling =false
UIView .animate (withDuration :0.25 ) {
self .searchController .searchBar .showsTags =false
}
}
// ...
}
We also set our isCancelling property to false here, the reason being, at this point, we know the user hasn't tapped the search bar's cancel button as it's not possible to focus the search bar text field having done so.
Next, searchBarTextDidEndEditing(_:). This is when we want to show our tags view, again inside a UIView.animate(withDuration:animations:) block.
class ViewController :UIViewController ,UISearchBarDelegate {
// ...
func searchBarTextDidEndEditing (_ searchBar:UISearchBar ) {
guard isCancelling ==false else {return }
UIView .animate (withDuration :0.25 ) {
self .searchController .searchBar .showsTags =true
}
}
// ...
}
Here, we've got a guard check that ensures our isCancelling property is set to false. We do this because, after the cancel button is tapped, the searchBarTextDidEndEditing(_:) method is called, so we would start to show our tags view while the search bar is being dismissed, causing a glitchy-looking animation.
Finally, searchBarCancelButtonClicked(_:). This one is super simple, we just need to set our isCancelling property to true.
class ViewController :UIViewController ,UISearchBarDelegate {
// ...
func searchBarCancelButtonClicked (_ searchBar:UISearchBar ) {
isCancelling =true
}
}
And the result...
Now I know I said that was the final step, but there is one tiny amendment we need to make to TaggedSearchBar... That is, we need to update the horizontal insets of our scroll view as, currently, ours tags hug the leading and trailing edges of the screen. Fortunately, this fix is pretty simple - it just takes a bit of mucking around with safe area insets. We just need to update our layoutTagsView() method in TaggedSearchBar.
class TaggedSearchBar :UISearchBar {
// ...
private func layoutTagsView () {
if let scopeBarContainerView {
// ...
let contentInset =searchTextField .frame .origin .x
let safeAreaInset =safeAreaInsets .left
tagsView .contentInset .left = contentInset - safeAreaInset
tagsView .contentInset .right = contentInset - safeAreaInset
tagsView .contentOffset .x = -contentInset
}
}
}
Conclusion
And there we have it! A pretty good recreation of the Apple Music search chips UI, even if I do say so myself. There may well be some edge cases that I haven't accounted for; if there are, feel free to shout at me on Twitter.
If you've skipped to the end and just want the complete source code, you're in luck! Check out this GitHub repository.
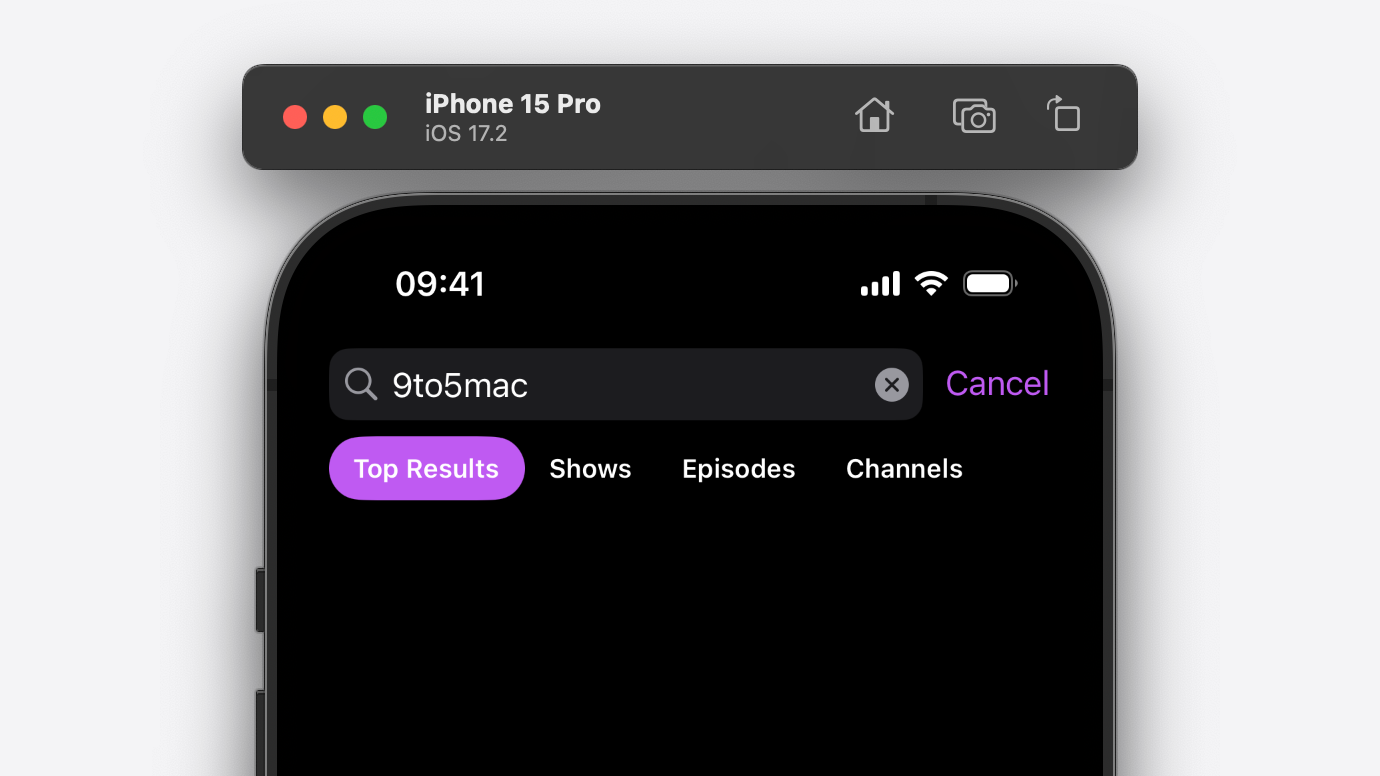
And finally, here's a dark mode Podcasts themed version of the UI we've built, for no reason other than I think it looks pretty sweet.