The processes of developing apps for macOS and iOS share many similarities. Developers use the same IDE, programming languages and tools to distribute their apps, across the board. Since SwiftUI’s introduction in 2019, the skill set is even more transferable with Apple’s “learn once, apply anywhere” philosophy behind the declarative UI framework. Prior to that, however, there was one key difference; macOS apps were built using the AppKit framework, and iOS apps were built using UIKit. These were both platform-specific frameworks that would not compile for the other’s target destination. That was until 2018 when Apple unveiled a years long project, codenamed Marzipan, that would allow the millions of iPad apps, built with UIKit, to be brought to the Mac with almost no code changes.
Marzipan, which would later be renamed to Mac Catalyst, was initially only used internally by Apple to bring a handful of iOS apps (News, Stocks, Home and Reminders) to the Mac in its 10.14 update, Mojave. The following year, Catalyst became available to third party developers in the iOS 13 SDK. Despite years of work, however, it was not without its limitations. Initially, Catalyst apps lacked the ability to customise many of the most important features of a Mac app, such as being able to spawn multiple windows, resize said windows and customise the menu bar. With that said, Apple has spent a lot of time improving Catalyst, with some of the best examples of Catalyst apps being almost indistinguishable from native Mac apps built with AppKit.
It’s worth noting that Catalyst should not be confused with the ability to run iOS apps natively on the Mac – a feature enabled by Apple’s recent introduction of proprietary, ARM-based silicon in their computers. Catalyst apps actually convert their UIKit components to native AppKit components at runtime when built for the Mac. For example, a UIButton is converted to an NSButton, or a UITextView gets converted to an NSTextView. But it’s not perfect, many AppKit controls don’t have a UIKit equivalent, so they’re just not available in Catalyst apps.
And there lies Catalyst’s biggest limitation – there is no way to use native AppKit components in your UIKit codebase, at least no way that Apple has exposed to developers... In this article, we’ll explore how to do just that!
Getting Started
Those who know me well know that I appreciate the breath of fresh air that is SwiftUI - but I’ve been more than a little vocal about its shortcomings. So, for a change, I’ll talk about something that I think it does really well - native framework compatibility. For the uninitiated, SwiftUI is largely, but not exclusively, backed by the native framework for a given platform; UIKit on iOS and AppKit for macOS. Apple made it incredibly easy to embed native components in your SwiftUI app. On iOS, we’d use SwiftUI’s UIViewRepresentable protocol to do this, or NSViewRepresentable on the Mac. The alternative for a Catalyst app is the private _UINSView class.
_UINSView does exactly what it says on the tin, it wraps an NSView in a UIView and, fortunately, the SPI (system programming interface) is pretty simple. There’s an initWithContentNSView: initialiser which works exactly as you’d expect, you simply call this constructor and pass in any NSView as the only argument. So, let’s create a simple UIView subclass that wraps this private view and the logic to initialise it so that we can reuse this component throughout our Catalyst app.

class UINSView :UIView {
let contentView :NSObject
init (contentView :NSObject ) {
self .contentView = contentView
super .init (frame : .zero )
setupUINSView ()
}
required init ?(coder :NSCoder ) {
fatalError ("init(coder:) has not been implemented" )
}
private func setupUINSView () {
let viewClass =NSClassFromString ("_UINSView" )as !UIView .Type
let allocSelector =NSSelectorFromString ("alloc" )
let initSelector =NSSelectorFromString ("initWithContentNSView:" )
let instance = viewClass.perform (allocSelector).takeUnretainedValue ()
let uinsView = instance.perform (initSelector,with :contentView ).takeUnretainedValue ()as !UIView
uinsView.translatesAutoresizingMaskIntoConstraints =false
addSubview (uinsView)
NSLayoutConstraint .activate ([
uinsView.topAnchor .constraint (equalTo :topAnchor ),
uinsView.leadingAnchor .constraint (equalTo :leadingAnchor ),
uinsView.trailingAnchor .constraint (equalTo :trailingAnchor ),
uinsView.bottomAnchor .constraint (equalTo :bottomAnchor )
])
}
}
There is one small problem though, we can’t import AppKit to initialise an NSView in an iOS codebase, despite its target destination being for the Mac. Fortunately, at runtime, the system dynamically loads the AppKit library so that UIKit can convert our UIViews into NSViews, so we can rely on the Objective-C runtime’s NSClassFromString(_:) method.

class ViewController :UIViewController {
override func viewDidLoad () {
super .viewDidLoad ()
let buttonClass =NSClassFromString ("NSButton" )as !NSObject .Type
let allocSelector =NSSelectorFromString ("alloc" )
let initSelector =NSSelectorFromString ("initWithFrame:" )
let instance = buttonClass.perform (allocSelector).takeUnretainedValue ()
let button = instance.perform (initSelector,with :CGRect .zero ).takeUnretainedValue ()as !NSObject
button.setValue ("Hello, World!" ,forKey :"title" )
let uinsView =UINSView (contentView : button)
uinsView.translatesAutoresizingMaskIntoConstraints =false
view .addSubview (uinsView)
NSLayoutConstraint .activate ([
uinsView.centerXAnchor .constraint (equalTo :view .centerXAnchor ),
uinsView.centerYAnchor .constraint (equalTo :view .centerYAnchor )
])
}
}
Now this is fine, it works, but it’s not great. We lose the type safety and performance of using the actual AppKit symbol, we lose the benefits of Xcode’s autocompletion, and if there are any changes to the API, this won’t cause a warning or compile time error, potentially causing unexpected behaviour or even a crash. We can do better.
Building a Bridge
The answer to our problem is creating an AppKit “bridge” – that is, a way of calling native AppKit code from an iOS app. So how can we do this? Bundles! A bundle is a directory that groups related resources and executables in a way that makes them easier to distribute and reuse. Helpfully, Xcode also allows you to specify which platform(s) your bundle should run on. If we specify macOS, we can access all the system frameworks that a normal Mac app could, including AppKit. So let’s create our Bundle.
To do that, open your iOS Xcode project and select the root node in the Project navigator pane on the left.
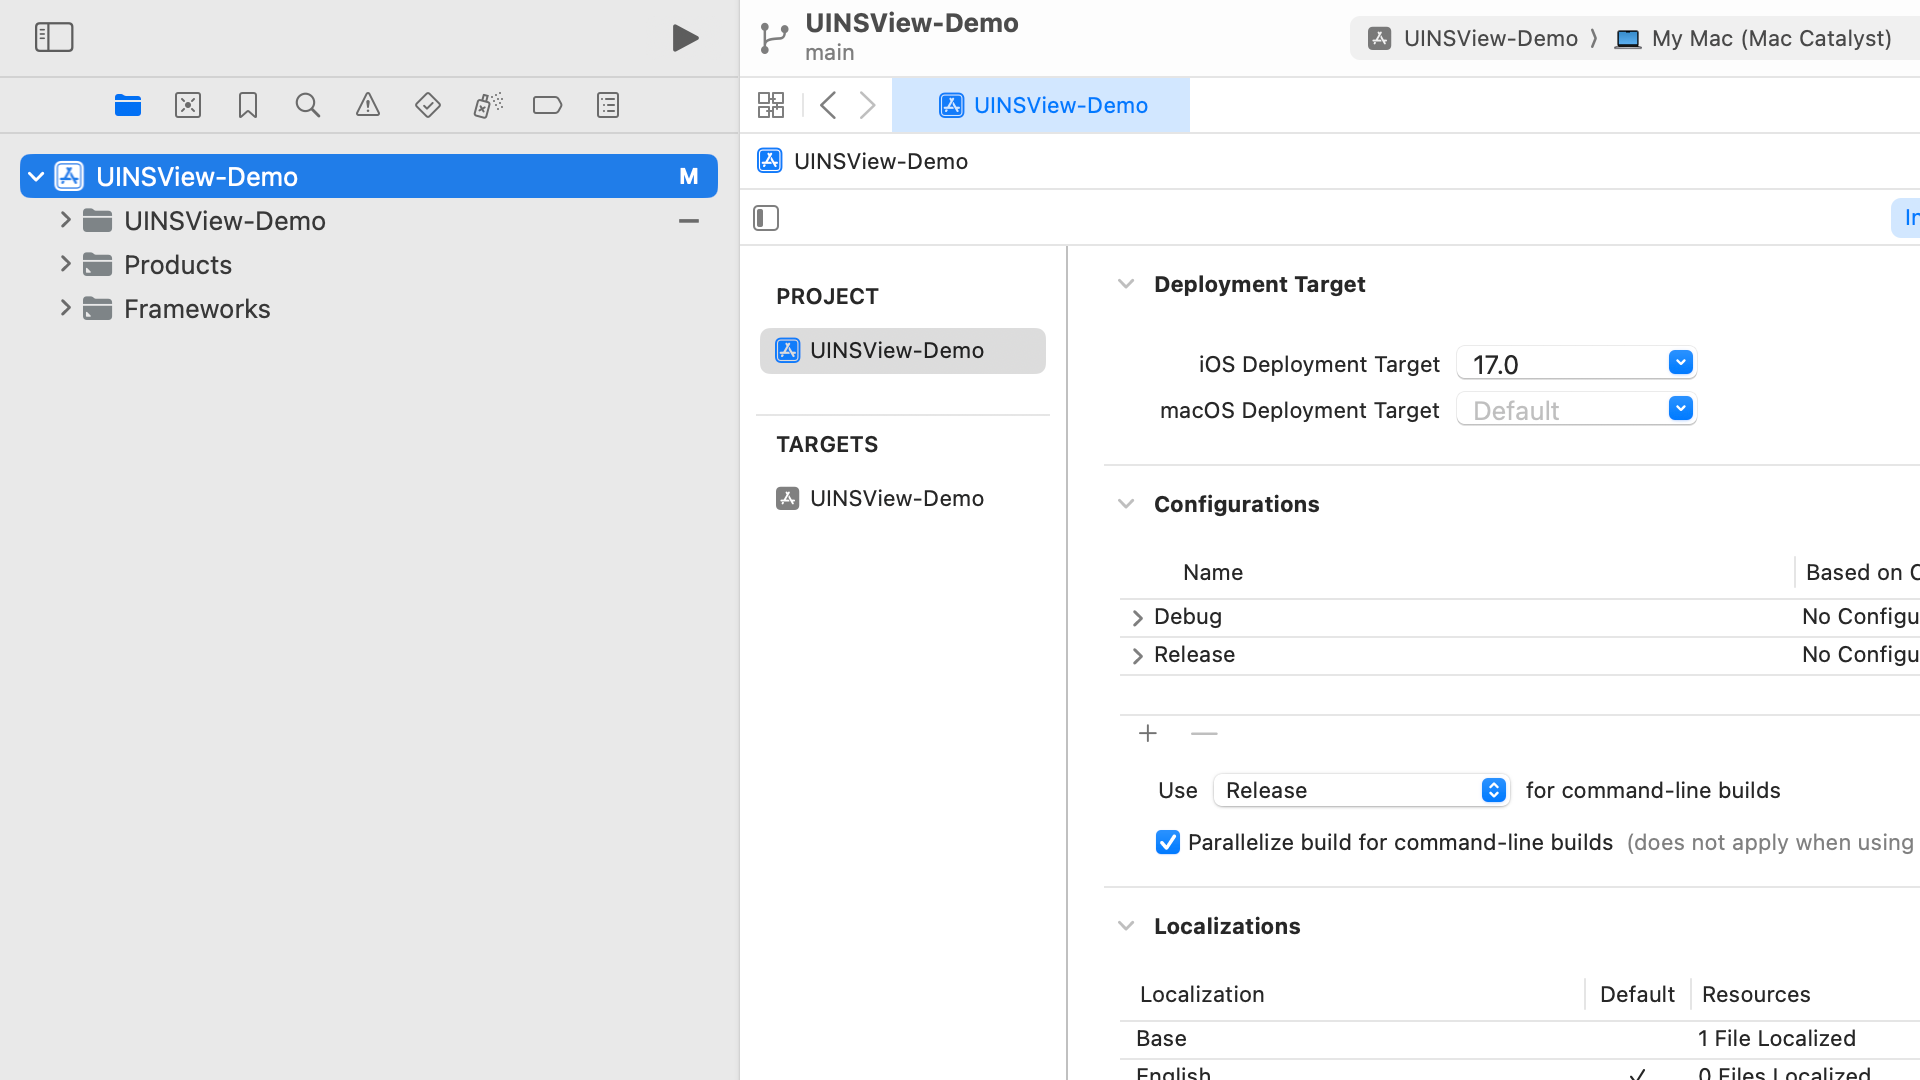
Then, in the projects and targets list, select the small "+" button at the bottom to add a new target.

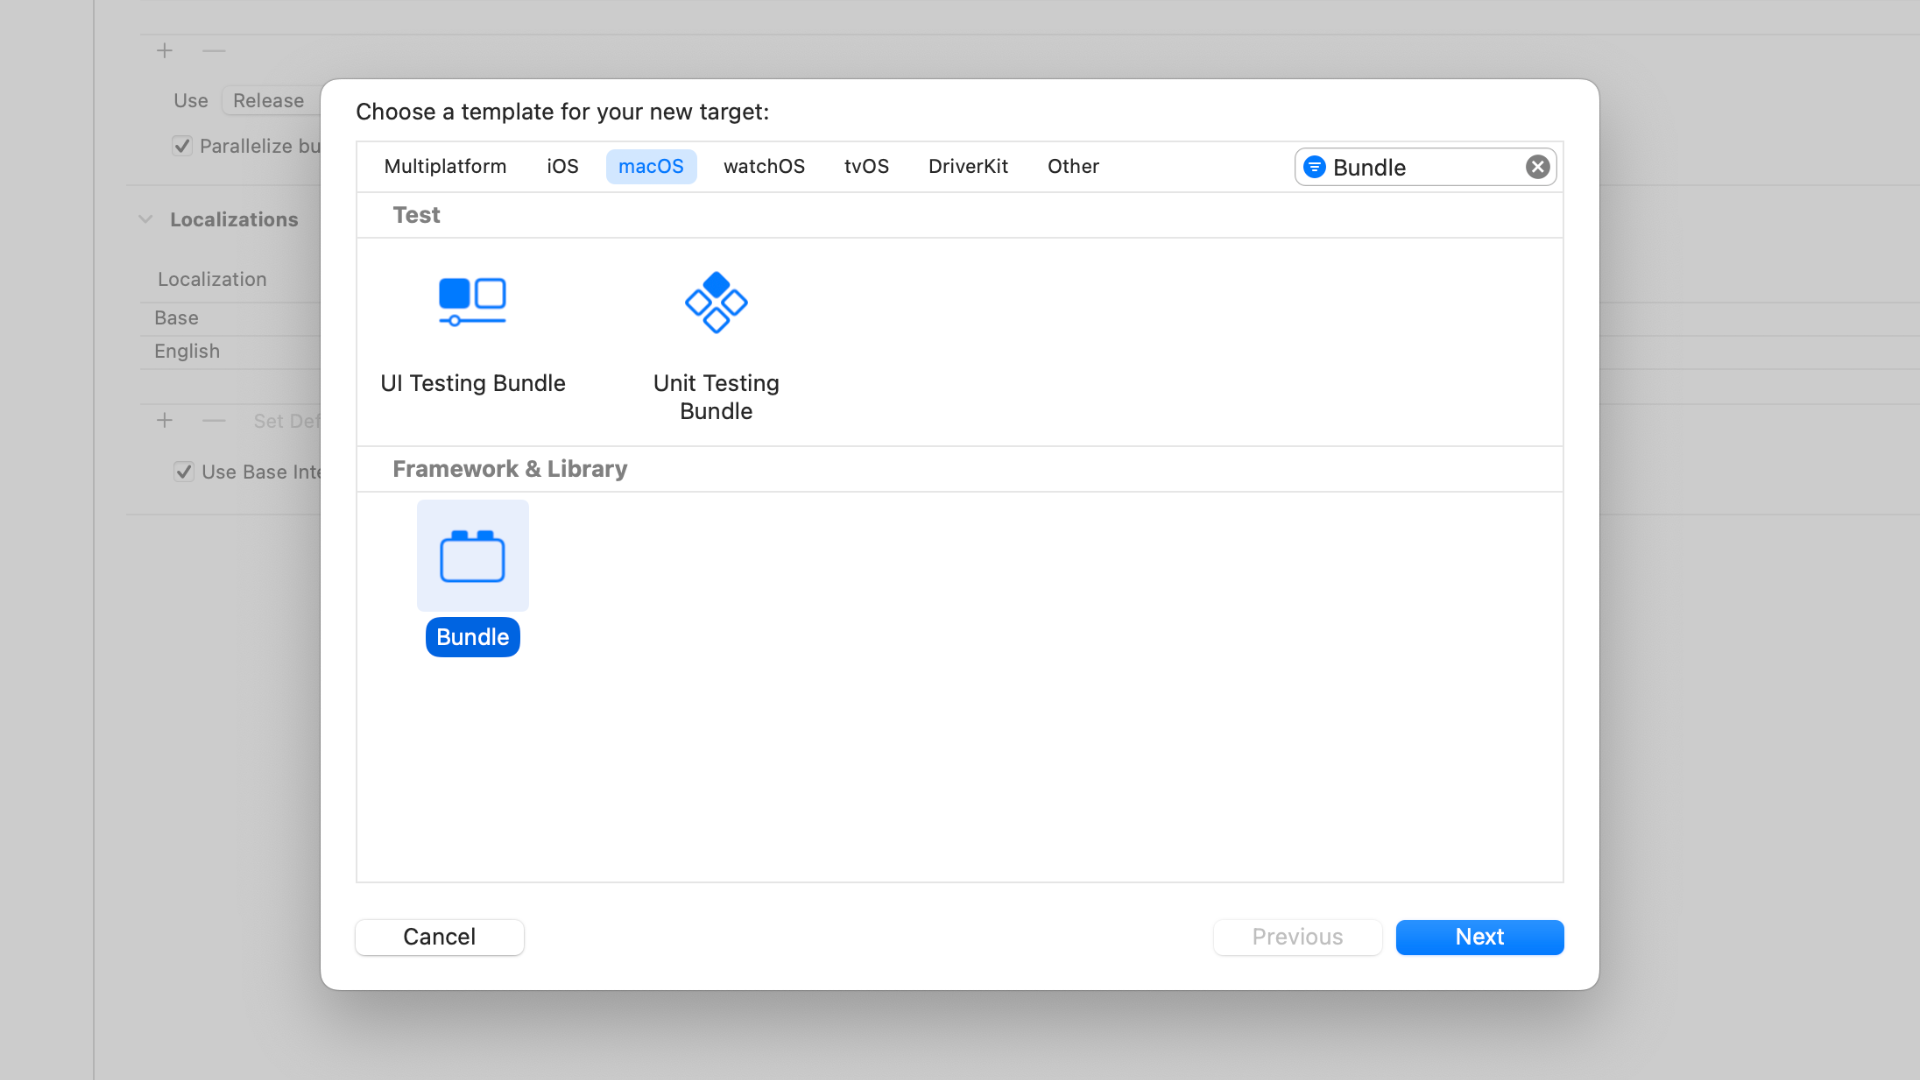
Select macOS as your platform, and search for "Bundle" in the search bar. Click "Next".
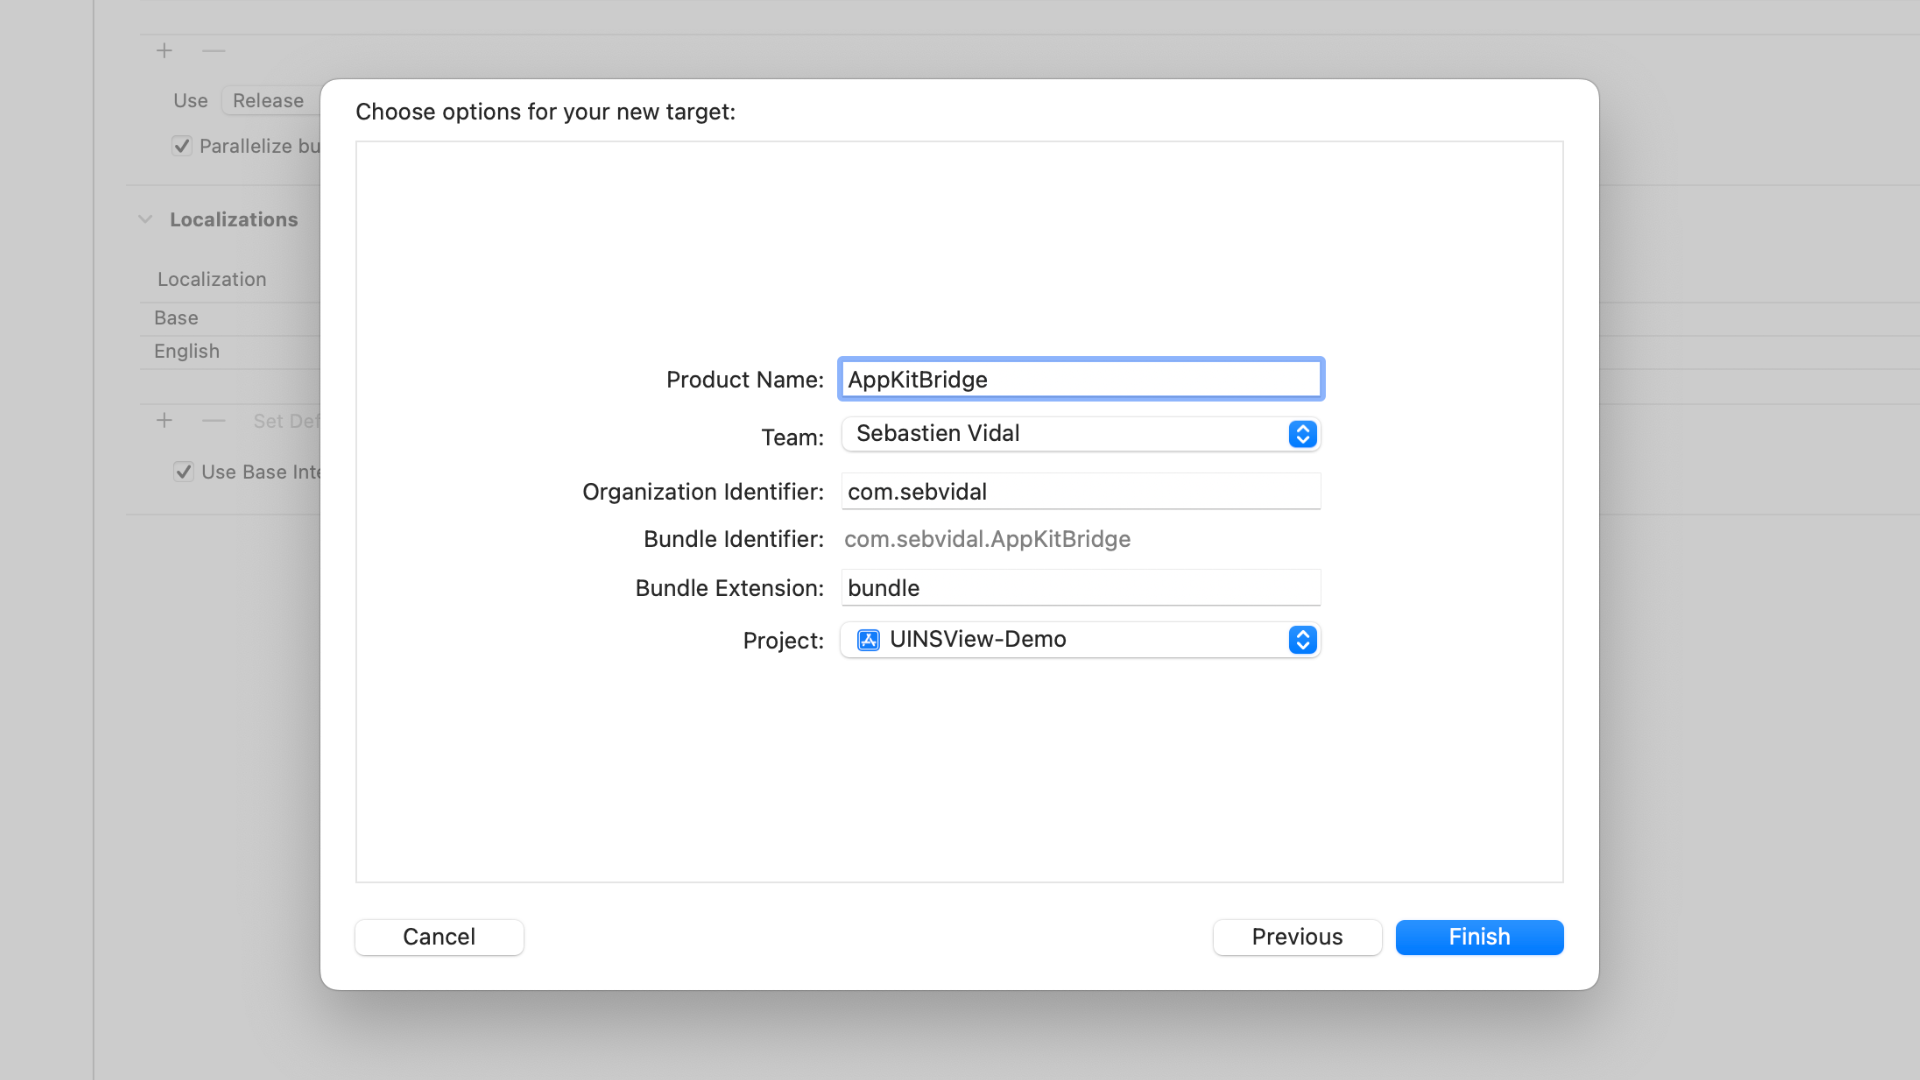
Finally, you'll be prompted to give your new Bundle a name - I called this "AppKitBridge". Having done this, click "Finish".
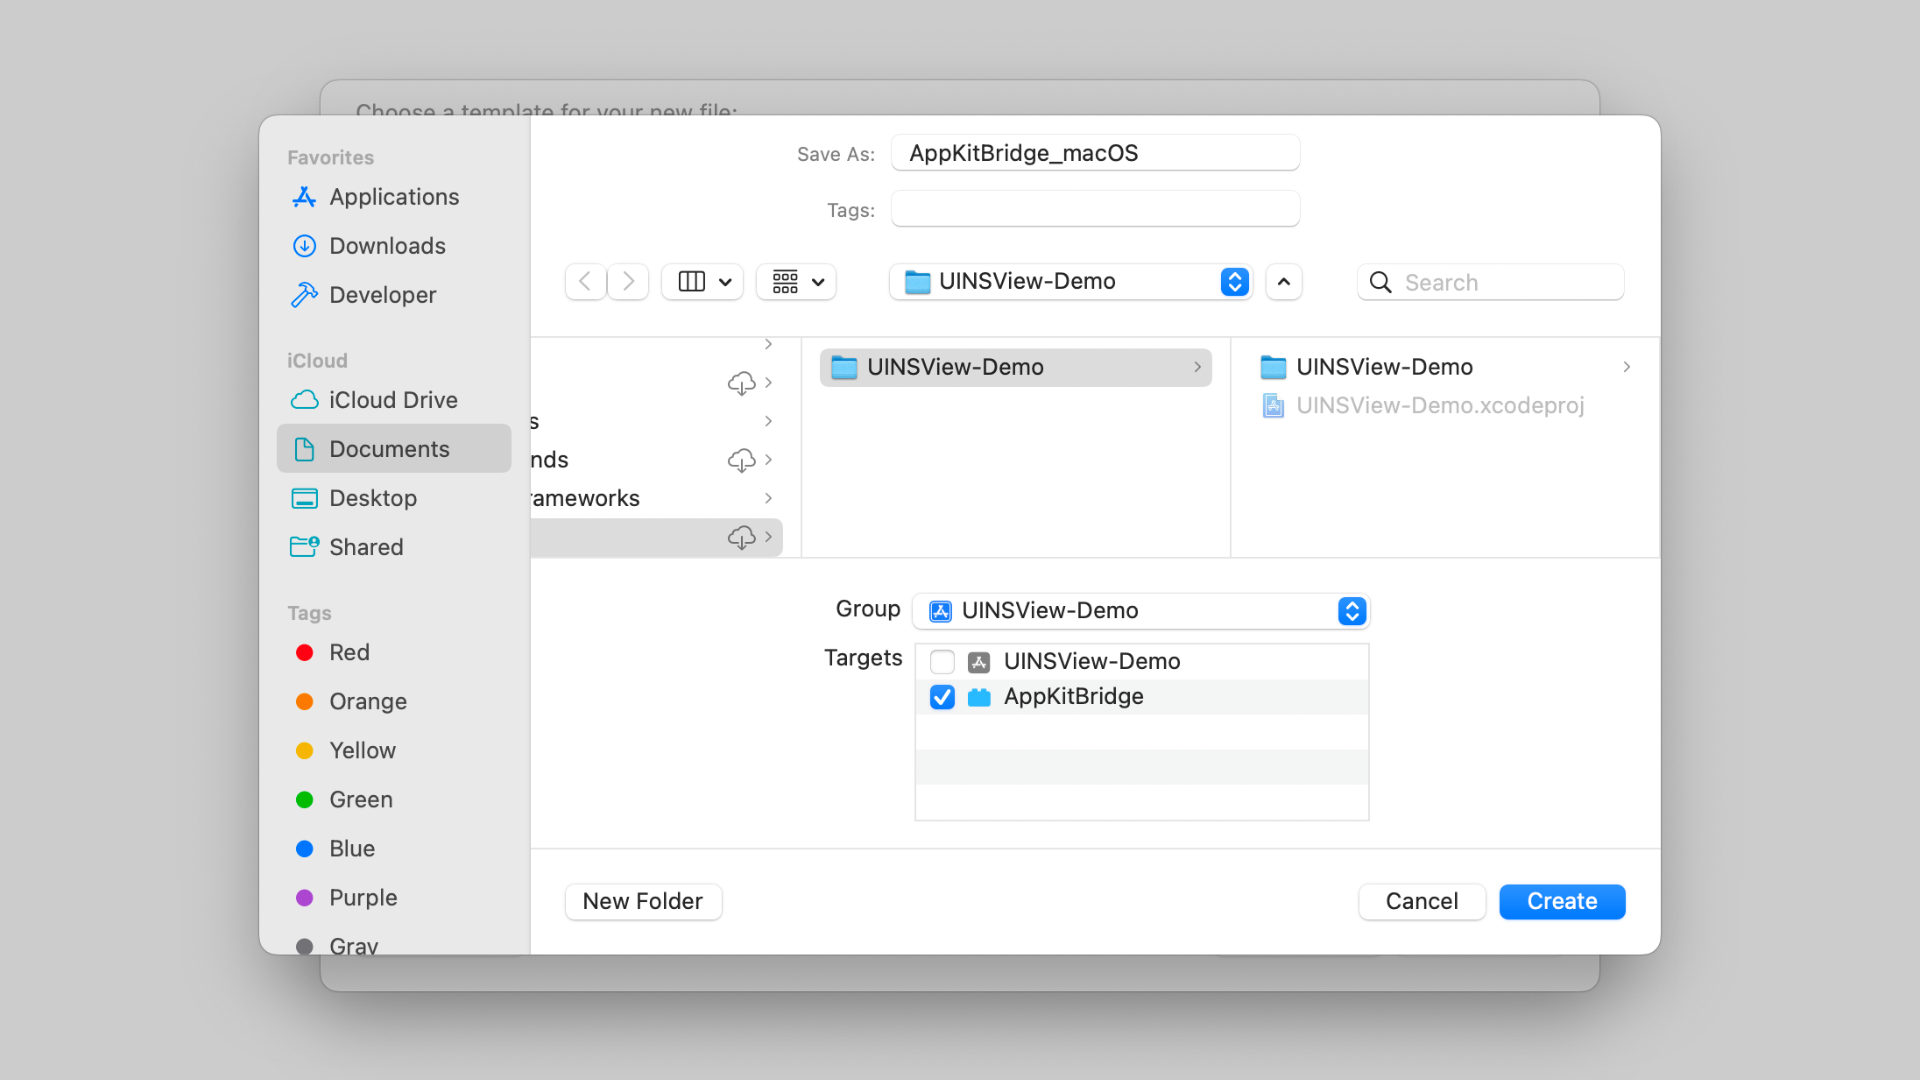
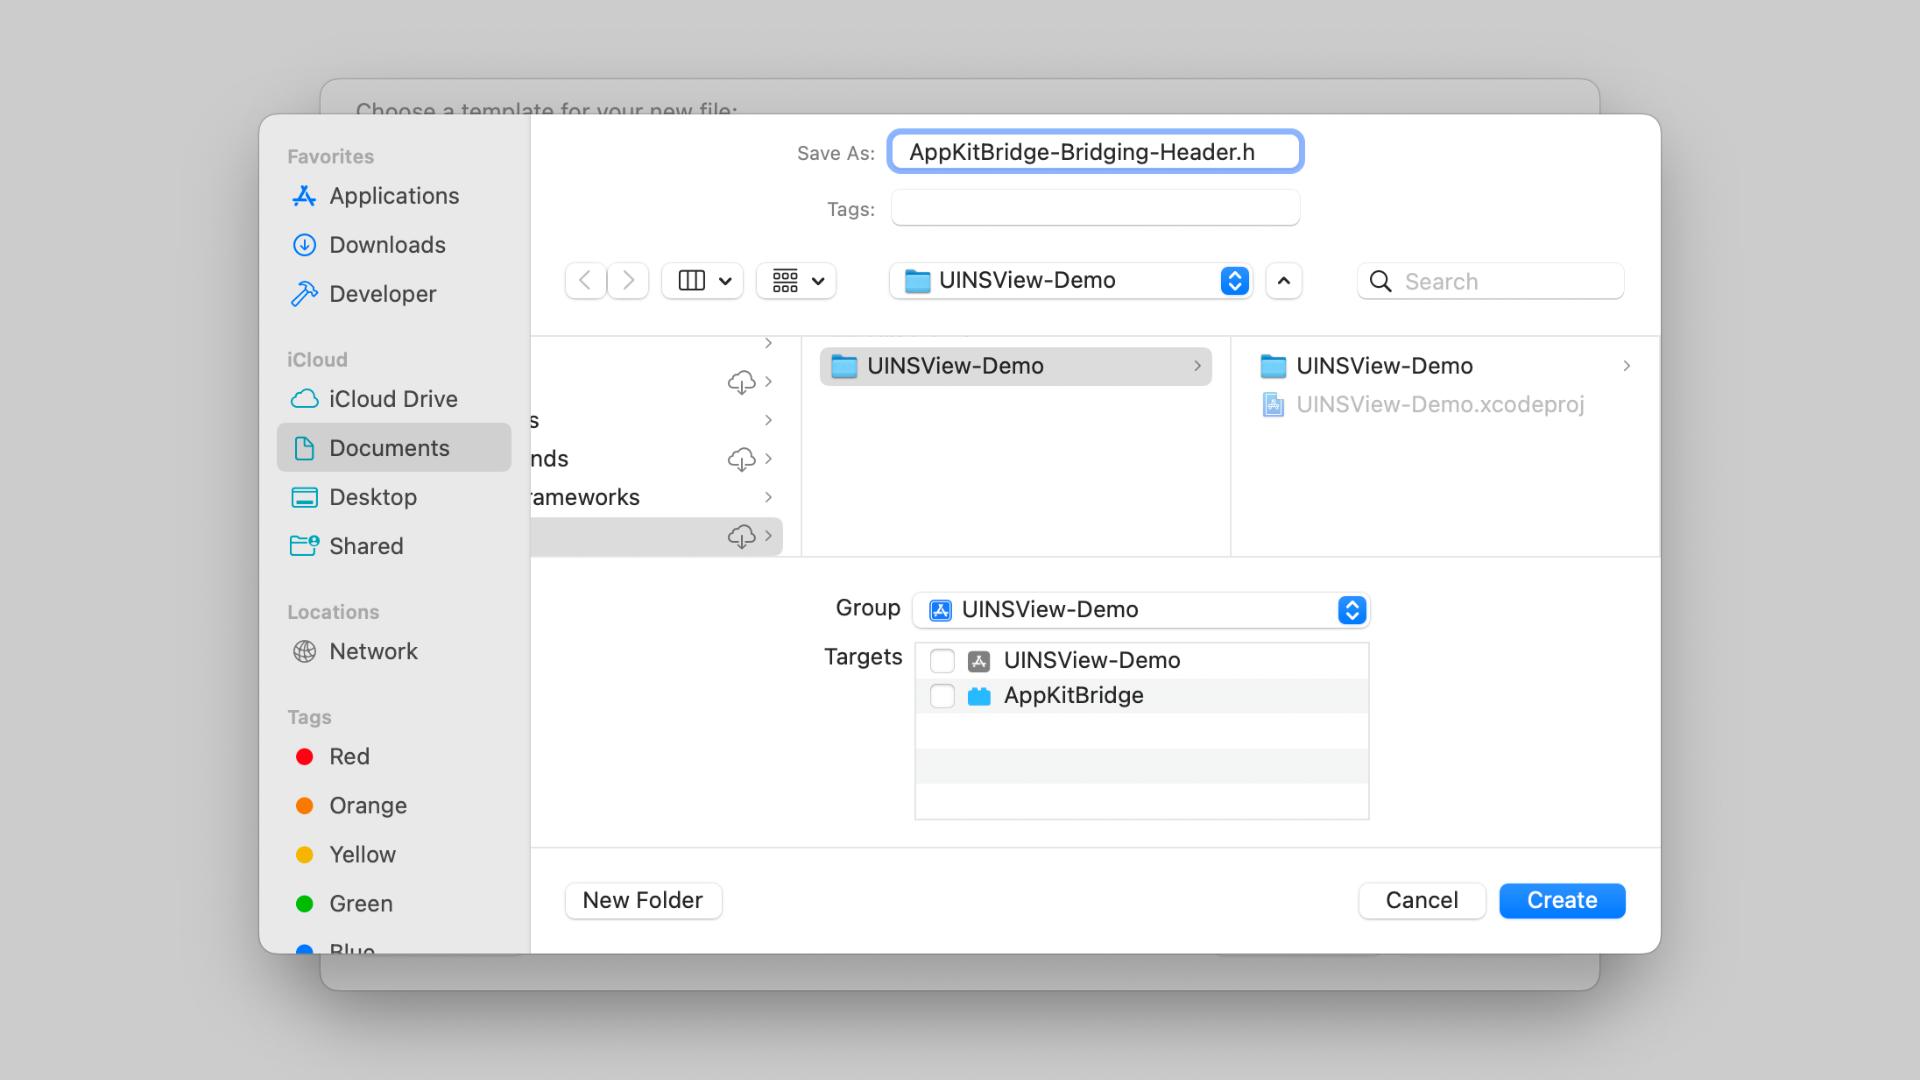
The first order of business is to create a new Swift file, I'm going to call this "AppKitBridge_macOS". Before you click "Create", ensure you've selected your new macOS Bundle only, in my case AppKitBridge, in the Targets section. You do not want to add this file to your app's iOS target. Ensuring these settings are correct, click "Create".
Inside this file, we'll now be able to import AppKit and create a new class called "AppKitBridge" that inherits from NSObject.

import AppKit
class AppKitBridge :NSObject {
}
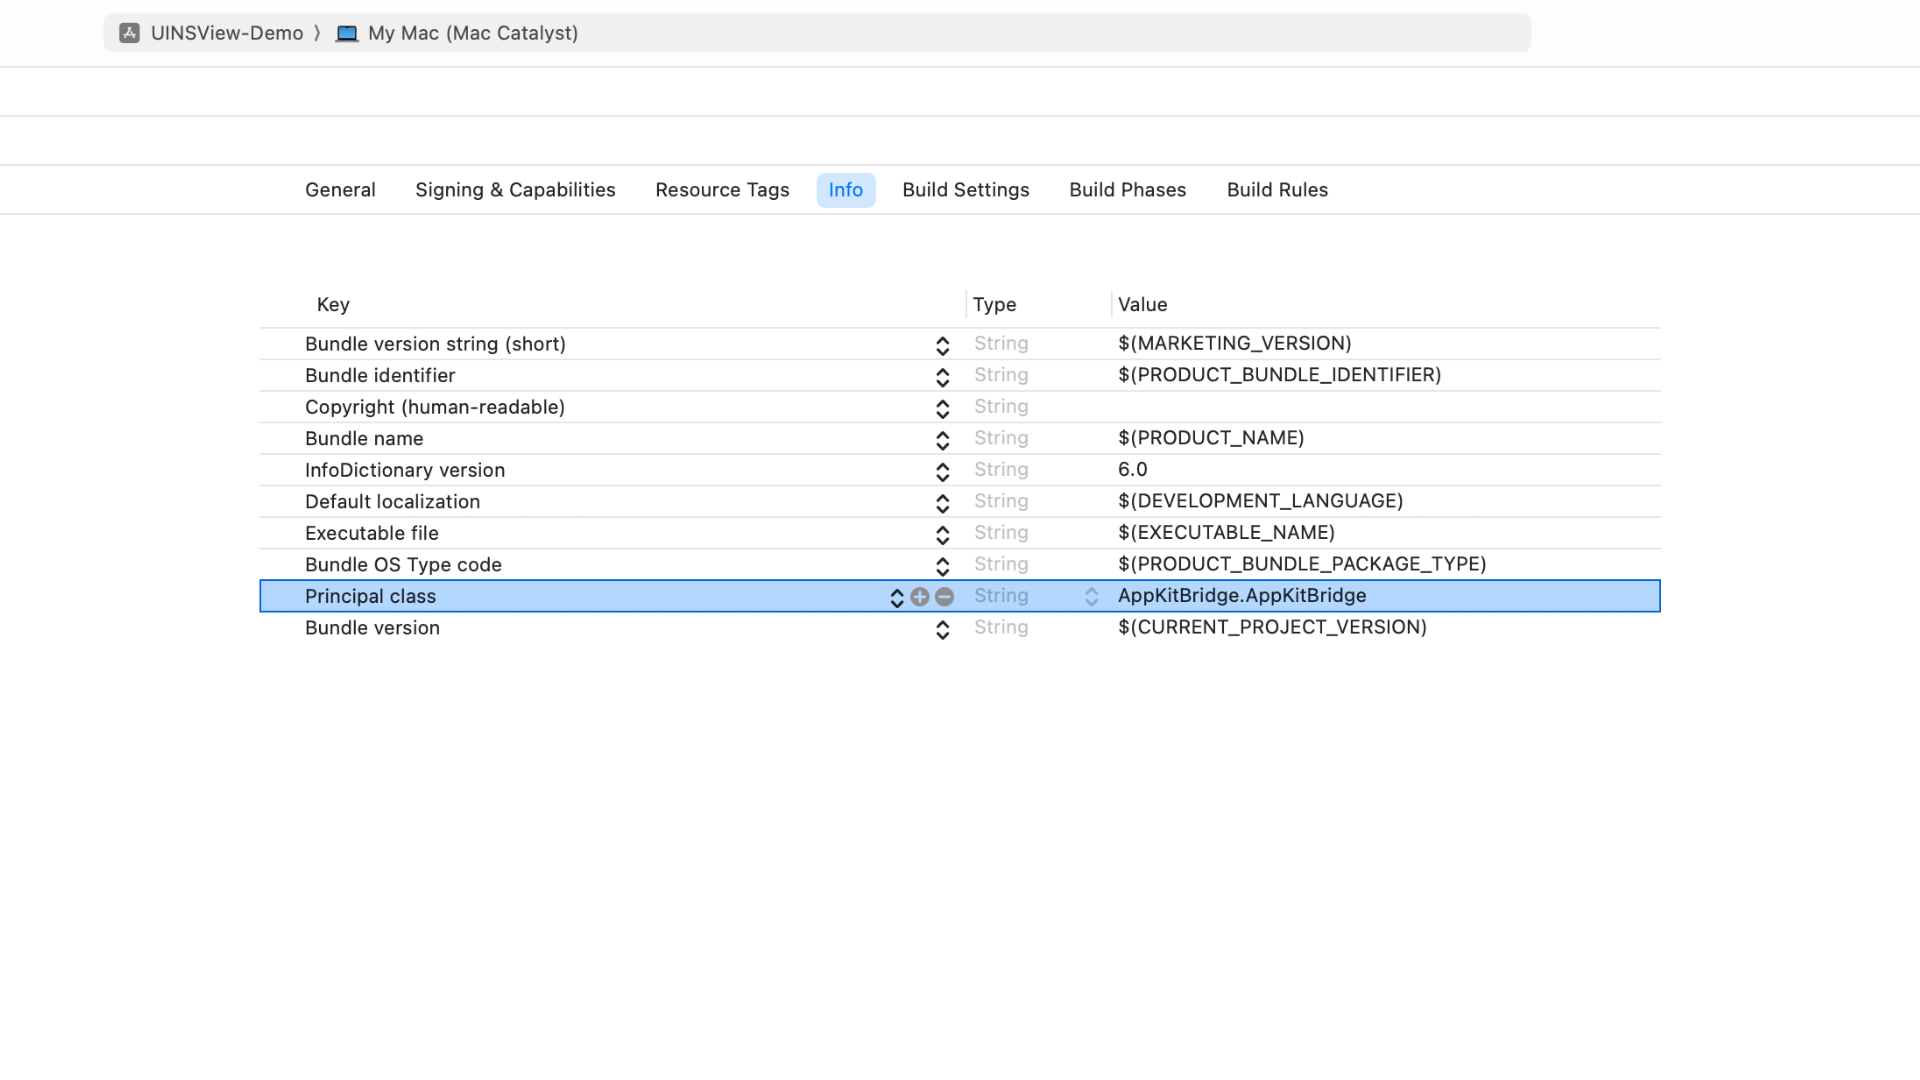
This class will be our Bundle's entry point, but we need to tell Xcode that. To do so, select your project again in the Project navigator, select your macOS Bundle in the projects and targets list, select the "Info" tab and, under the "Custom macOS Bundle Target Properties" header, find the "Principal class" key. You'll need to set the value of this key to the name of your Bundle, followed by a dot, followed by the name of the desired principal class, in this case, "AppKitBridge.AppKitBridge".
The files we add to this target will be completely isolated from our iOS app, but we need a nice way to call this code without workarounds like NSClassFromString(_:). In this instance, we can use protocols - but not Swift protocols. To give you a clue as to why, consider this example... We have two bundles, Bundle-A and Bundle-B. We define a protocol called MyProtocol and add it as a member of both targets. Swift will actually create two protocols here, with the qualified names Bundle-A.MyProtocol and Bundle-B.MyProtocol. Meaning that, even though they share a declaration, they're considered to be two different types. At runtime, an attempt to cast an object declared in Bundle-A to MyProtocol in Bundle-B will fail. Fortunately, we can rely on our old friend Objective-C.
For those unfamiliar, Objective-C protocols are declared in header files, and header files don't belong to a specific target. In fact, if you try to add a header file as a member of a target, Xcode just won't let you. We can take advantage of this behaviour to share a protocol definition across our main app target and our AppKit bridge.
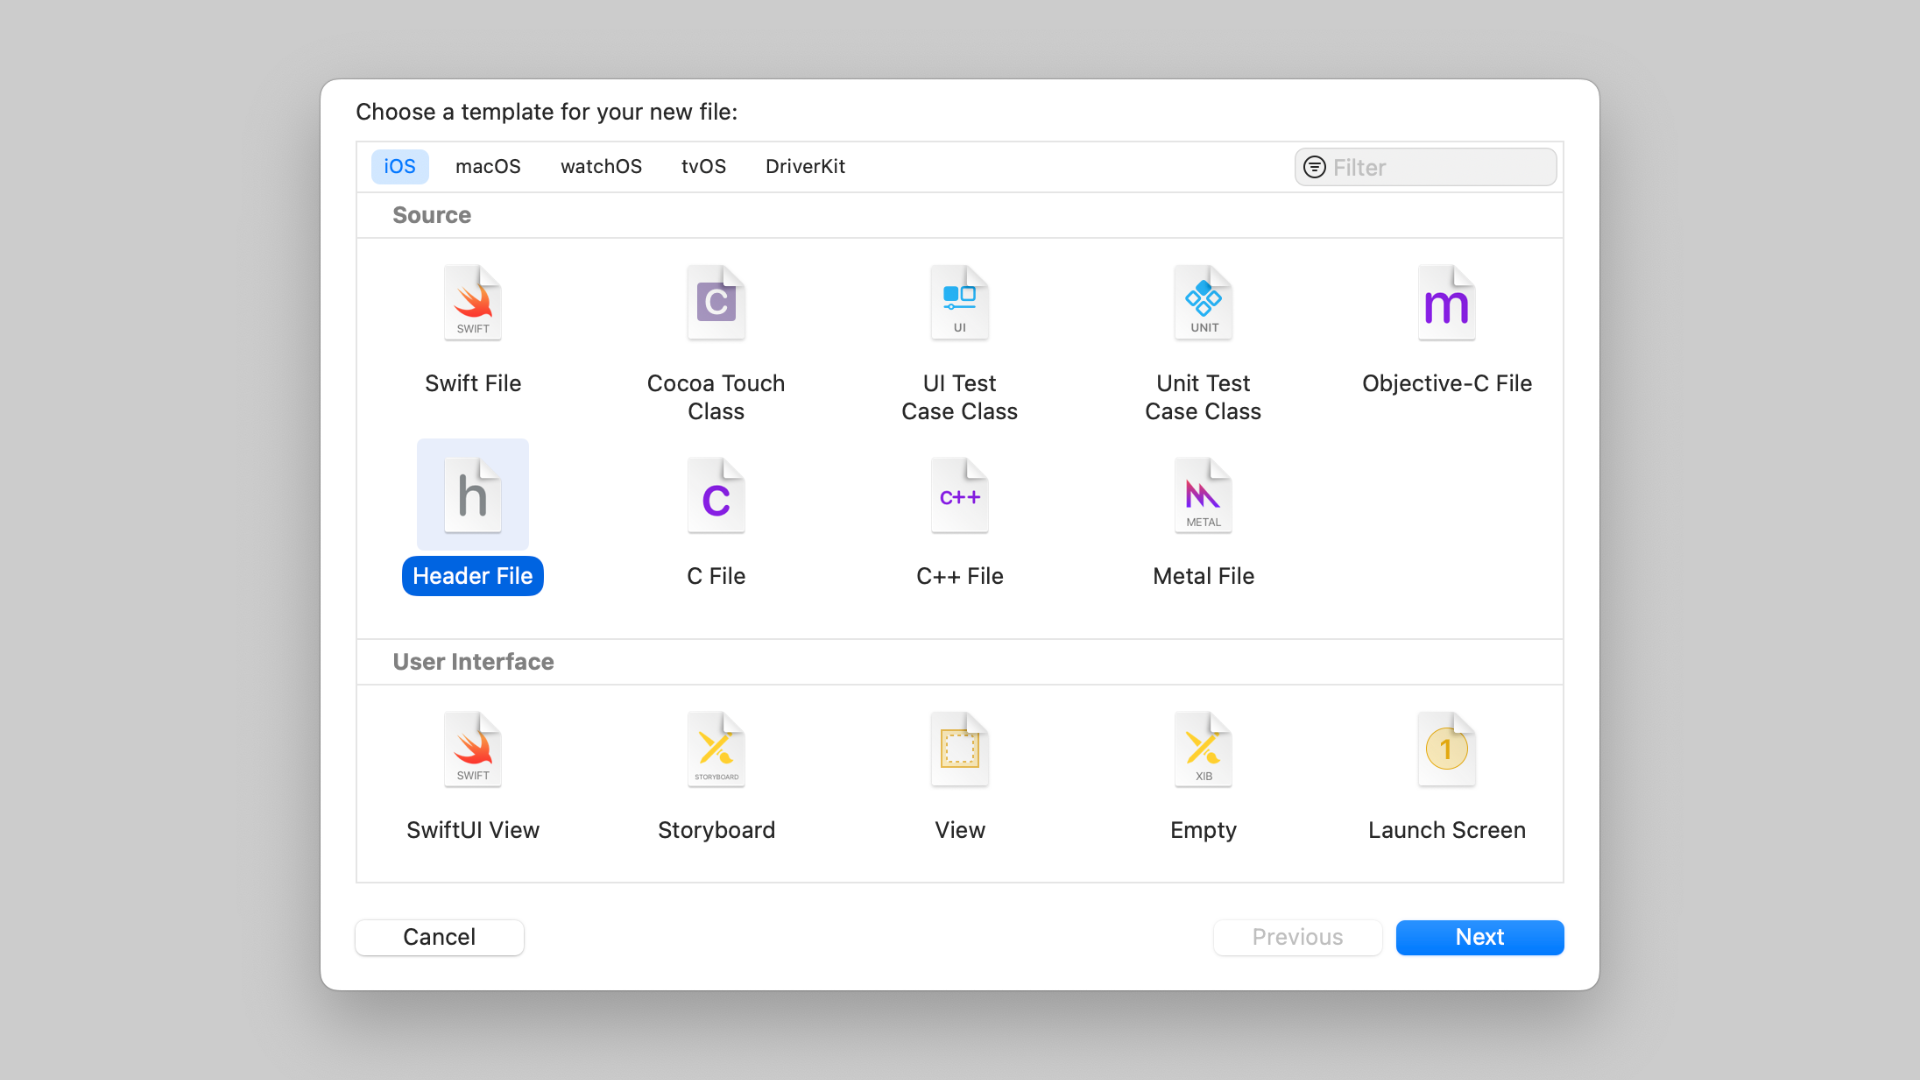
All we need to do is create a new Objective-C header file called "AppKitBridge-Bridging-Header". To do that, create a new file as you normally would but instead of creating a Swift file, select "Header File". Click Next.
Name the file "AppKitBridge-Bridging-Header.h" and click "Create".
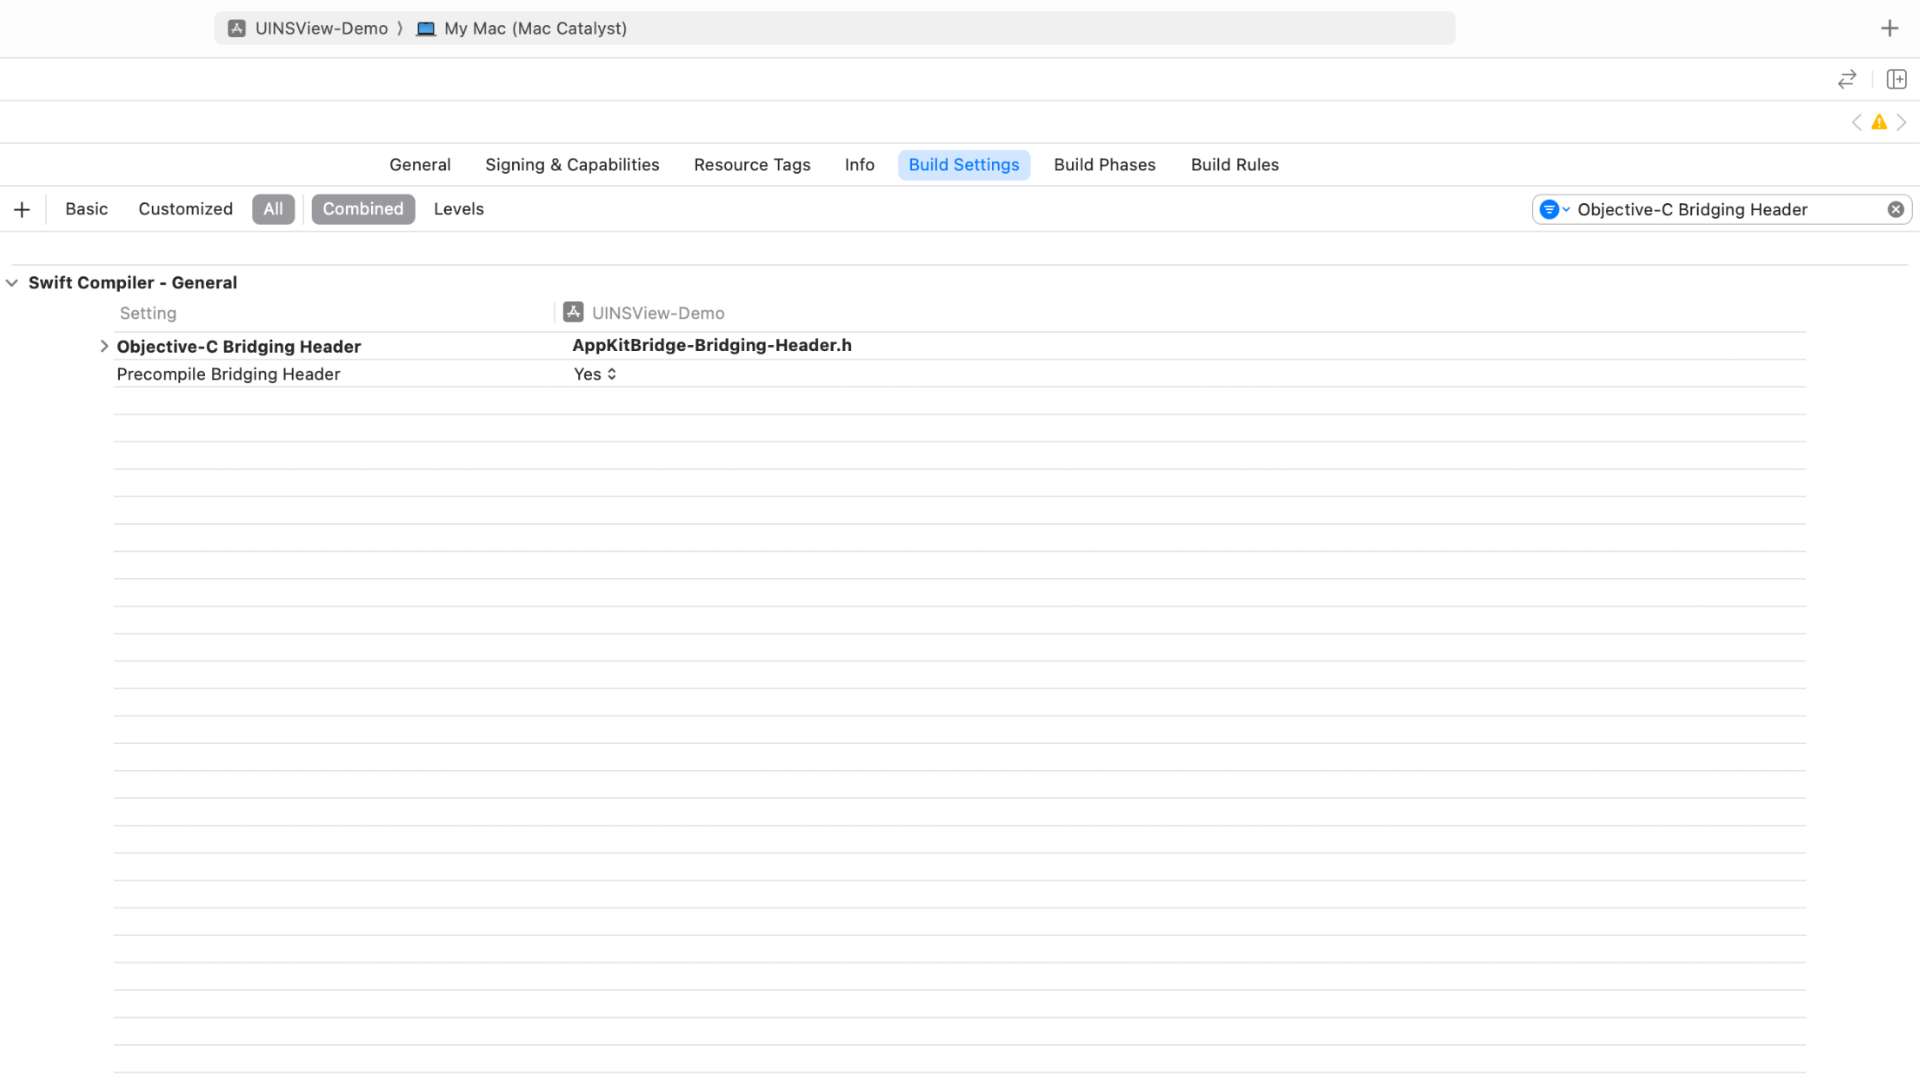
Before we create our Objective-C protocol, we're going to need to tell our macOS and iOS targets about this bridging header. To do so, go back to your project in the Project navigator, holding down the Shift key, select both your macOS and iOS targets in the project and target list. This should automatically select the "Build Settings" tab. In the search bar, search for "Objective-C Bridging Header". Set this property to "AppKitBridge-Bridging-Header.h".
OK, protocol time. We're going to declare a simple protocol called AppKitBridgeProtocol. For now, it'll have a single method, buttonWithTitle:, that returns an NSObject. In Swift, that would look like this...

protocol AppKitBridgeProtocol :NSObject {
func button (with title:String ) ->NSObject
}
However, we're dealing with Objective-C. So, ignore the code snippet above and instead add this code to AppKitBridge-Bridging-Header.h...

@protocol AppKitBridgeProtocol <NSObject >
-(nonnull NSObject *)buttonWithTitle :(nonnull NSString *)title;
@end
We'll then go back to our AppKitBridge_macOS.swift file and add AppKitBridgeProtocol conformance to our AppKitBridge class...

class AppKitBridge :NSObject ,AppKitBridgeProtocol {
func button (withTitle title:String ) ->NSObject {
let button =NSButton ()
button.title = title
return button
}
}
Crossing the Bridge
With our AppKit bridge setup in our macOS bundle, we now need to write some code to access it from the iOS app target. To do this, we need to create a new Swift file and add it as a member of our iOS app target only. I'm going to call this file AppKitBridge_iOS.swift. Here's the implementation...

class AppKitBridge {
private static var appKitBridge :AppKitBridgeProtocol !
static var shared :AppKitBridgeProtocol {
return appKitBridge ??loadAppKitBridgeBundle ()
}
private static func loadAppKitBridgeBundle () ->AppKitBridgeProtocol {
let url =Bundle .main .builtInPlugInsURL !.appendingPathComponent ("AppKitBridge.bundle" )
let bundle =Bundle (url : url)!
bundle.load ()
let principalClass = bundle.principalClass as !NSObject .Type
appKitBridge = principalClass.init ()as ?AppKitBridgeProtocol
return appKitBridge
}
}
Here, we've essentially created a singleton. The shared computed property returns the value of appKitBridge or, if it's nil, the value returned by the loadAppKitBridgeBundle() method. This function...
- Initialises a
Bundleobject from the providedurland loads it. - Obtains a reference to the bundle's
principalClassand casts it to the type ofNSObject. - Initialises and returns the principal class and casts it to the shared
AppKitBridgeProtocoltype, also storing it in the class' staticappKitBridgeproperty.
Back in ViewController.swift, we can put the pieces of the puzzle together...

class ViewController :UIViewController {
override func viewDidLoad () {
super .viewDidLoad ()
let button =AppKitBridge .shared .button (withTitle :"Hello, World!" )
let uinsView =UINSView (contentView : button)
uinsView.translatesAutoresizingMaskIntoConstraints =false
view .addSubview (uinsView)
NSLayoutConstraint .activate ([
uinsView.centerXAnchor .constraint (equalTo :view .centerXAnchor ),
uinsView.centerYAnchor .constraint (equalTo :view .centerYAnchor )
])
}
}
If we build and run the project....
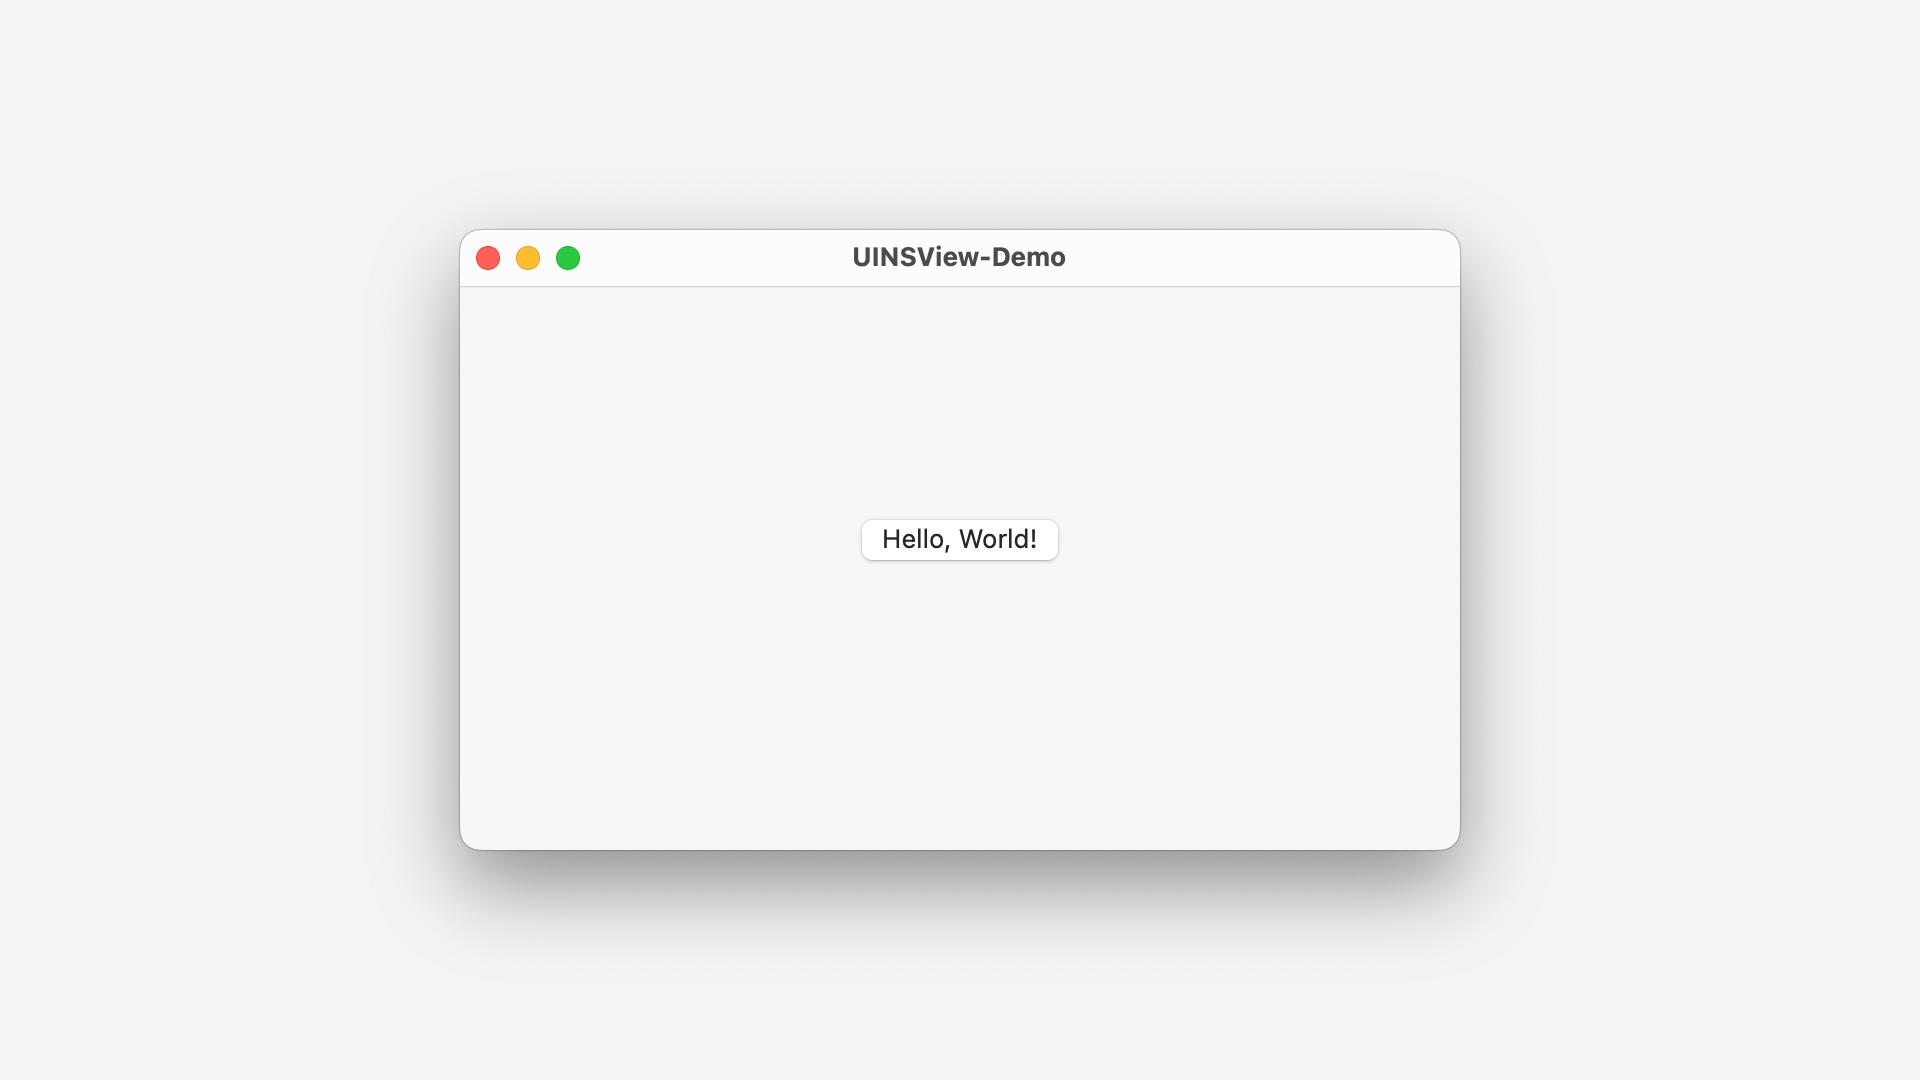
Looking good! But we can do better still...
While it's pretty cool getting our NSButton working in our UIKit-based app, a button with just a title isn't much use. You could expand the AppKitBridgeProtocol's buttonWithTitle: method to include more parameters, i.e. buttonWithTitle:target:action:, but this could get pretty long pretty quickly. NSButton has dozens of properties that allow you to customise the appearance and behaviour of the button, and that's not including everything it inherits from NSControl.
The best solution (that I could think of) was another protocol, this time named NSButtonConfigurationProtocol. We're also going to replace our buttonWithTitle: method with buttonWithConfiguration: which will take a single argument of type NSButtonConfigurationProtocol. Here's what that looks like...

@protocol NSButtonConfigurationProtocol
@property (nonatomic ,copy )NSString *title ;
@property (nonatomic ,nullable )id target ;
@property (nonatomic ,nullable )SEL action ;
@property (nonatomic )NSInteger controlSize ;
@property (nonatomic ,copy ,nullable )NSString *keyEquivalent ;
@end
@protocol AppKitBridgeProtocol <NSObject >
-(nonnull NSObject *)buttonWithConfiguration :(nonnull id <NSButtonConfigurationProtocol >)configuration;
@end
In AppKitBridge_macOS.swift, we'll need to update our protocol conformance to implement the new buttonWithConfiguration: method.

class AppKitBridge :NSObject ,AppKitBridgeProtocol {
func button (withConfiguration configuration:NSButtonConfigurationProtocol ) ->NSObject {
let button =NSButton ()
button.title = configuration.title
button.action = configuration.action
button.target = configuration.target as ?AnyObject
button.keyEquivalent = configuration.keyEquivalent ??""
button.controlSize =NSControl .ControlSize (rawValue : configuration.controlSize ) ?? .regular
return button
}
}
On the iOS side of things, we can create a new object that conforms to our new button configuration protocol. This is the object we'll pass in to the new buttonWithConfiguration: method of our AppKit bridge.

class NSButtonConfiguration :NSButtonConfigurationProtocol {
var target :Any ? =nil
var action :Selector ? =nil
var title :String ="Button"
var keyEquivalent :String ? =nil
var controlSize :Int =0
}
Back in ViewController.swift, we can take advantage of our new buttonWithConfiguration: method.

class ViewController :UIViewController {
override func viewDidLoad () {
super .viewDidLoad ()
let configuration =NSButtonConfiguration ()
configuration.target =self
configuration.action =#selector (buttonTapped )
configuration.title ="Hello, World!"
configuration.keyEquivalent ="\r"
configuration.controlSize =3
let button =AppKitBridge .shared .button (withConfiguration : configuration)
// ...
}
@objc func buttonTapped (_ sender:Any ) {
let closeAction =UIAlertAction (title :"Close" ,style : .default)
let alertController =UIAlertController ()
alertController.title ="Hello, World!"
alertController.addAction (closeAction)
present (alertController,animated :true )
}
}
And here's the result...
Conclusion
There you have it - using AppKit views right in your Mac Catalyst app. A couple of things here to note... Firstly, this will only work on macOS, so make sure you add the relevant #if targetEnvironment(macCatalyst) checks when calling code in your macOS bundle. If you want, you can decorate the AppKitBridge class with the @available(macCatalyst 13, *) and
@available(iOS, unavailable) attributes. Secondly, yes, _UINSView is a private API - obfuscate strings, don't force unwrap, and perform responds(to:) selector checks, etc, etc.
If you want to expand upon this but aren't familiar with Objective-C, declare your configuration protocols in Swift and ask an LLM to convert the code to Objective-C - this works surprisingly well!
As always, if you've got questions, suggestions or just need someone to vent to about Catalyst being a somewhat forgotten technology by Apple, hit me up on Twitter.
Until next time...
